As you make your way through the story, you’ll come across all kinds of puzzles, complications, and obstacles standing between you and your escape.
There are three types of puzzles throughout the game:
Here, we’ll be focusing on the puzzles, most of which stand directly in the way of your progress. These puzzles have several important features:
This statue is at the top of the stairs in the Police Station Main Hall. Turn the dials so that they match the symbols shown on the statue in the top-left corner of the dead officer’s notebook.
Enter the lion, branch, and bird symbols. You’ll receive the Lion Medallion.
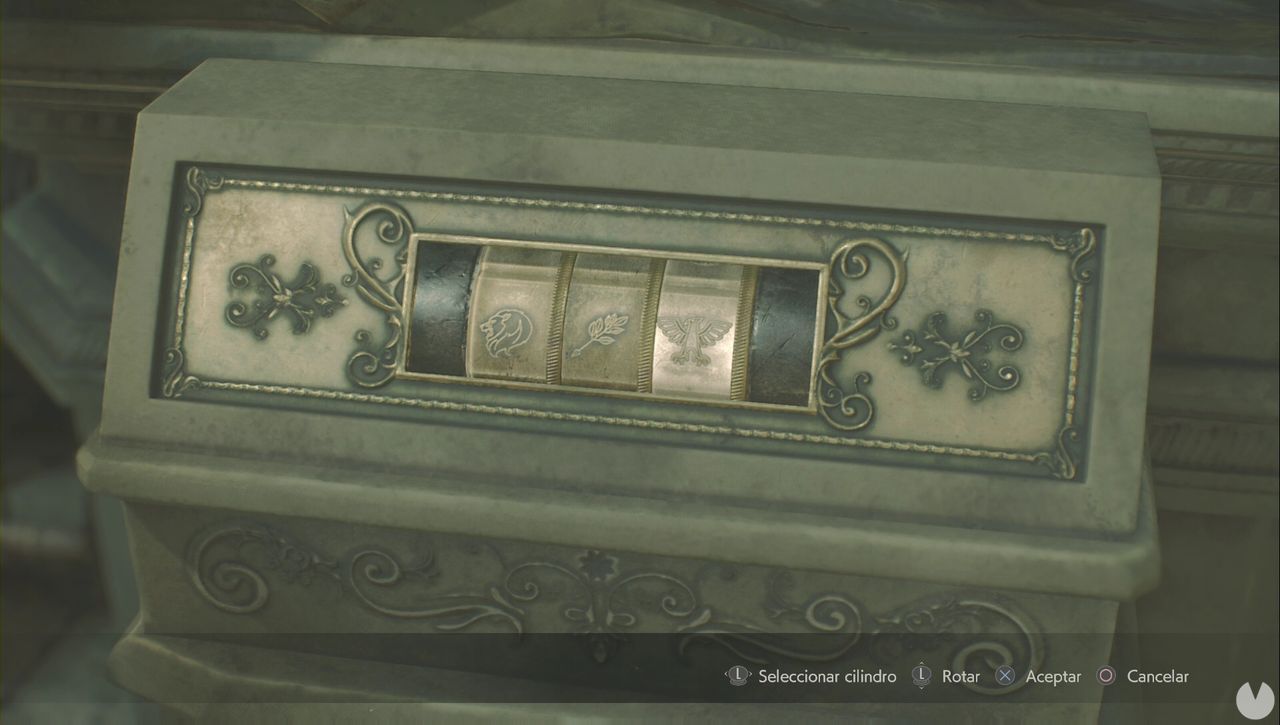
The Lion Statue solution in the 2nd Run is: crown, torch, and dove.
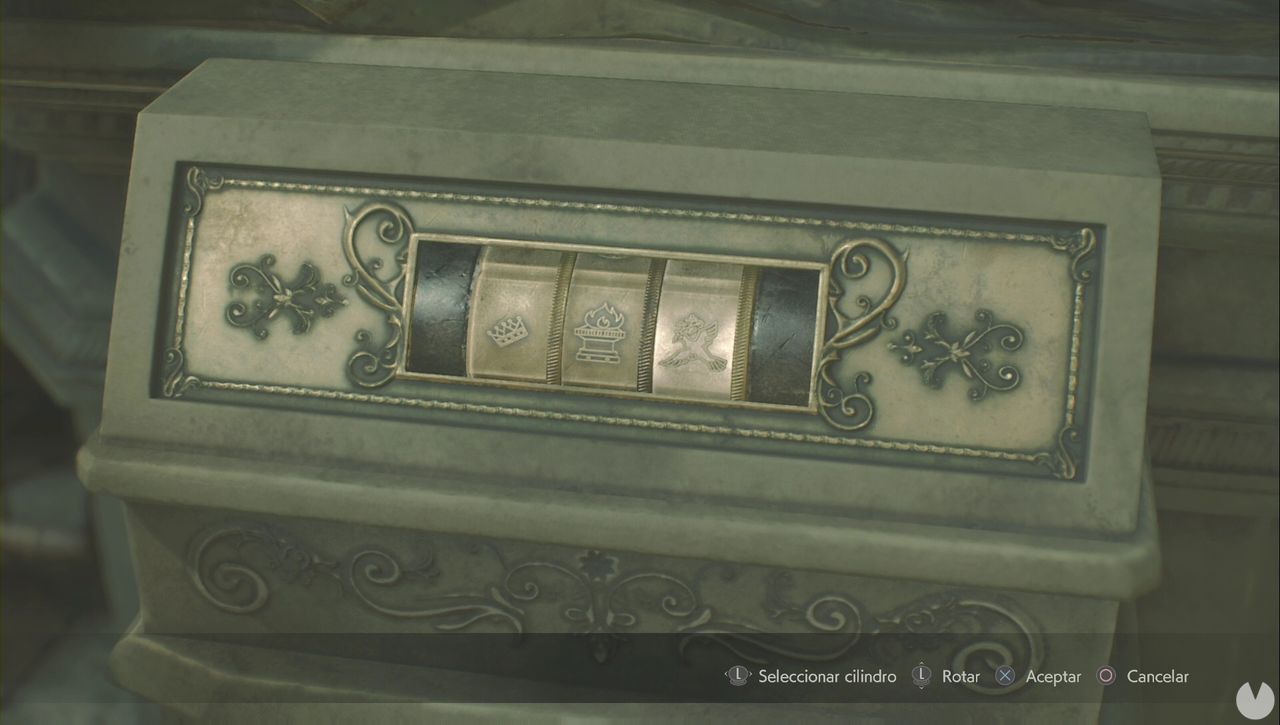
This isn’t a particularly complicated puzzle. You’ll find it in the Safety Deposit Room on the first floor of the Police Station. Simply enter the number of the locker you want to open. The problem is that the 2 and 3 buttons are missing. You’ll get them by solving the Portable Safe 1 and Portable Safe 2 puzzles.
You’ll find the Portable Safe in the second-floor Shower Room. Pick it up like any other item and examine it to solve the puzzle. You simply need to press the buttons in the correct order, causing the lights to turn green one by one. The solution is randomized, so you’ll have to experiment until you find the right sequence.
Inside is one of the Spare Keys needed for the Safety Deposit Room lockers puzzle.
In the 2nd Run, the safe is in the Interrogation Room/Observation Room on the east side of the first floor.
You’ll find it in the Linen Room, which can only be opened with the Diamond Key. As with the first safe, simply press the buttons until the lights come on in sequence. The solution is randomized. Inside is the second Spare Key for the Safety Deposit Room.
This puzzle works just like the Lion Statue puzzle. Open the notebook to see the solution. The symbols you need are fish, scorpion, and vase.
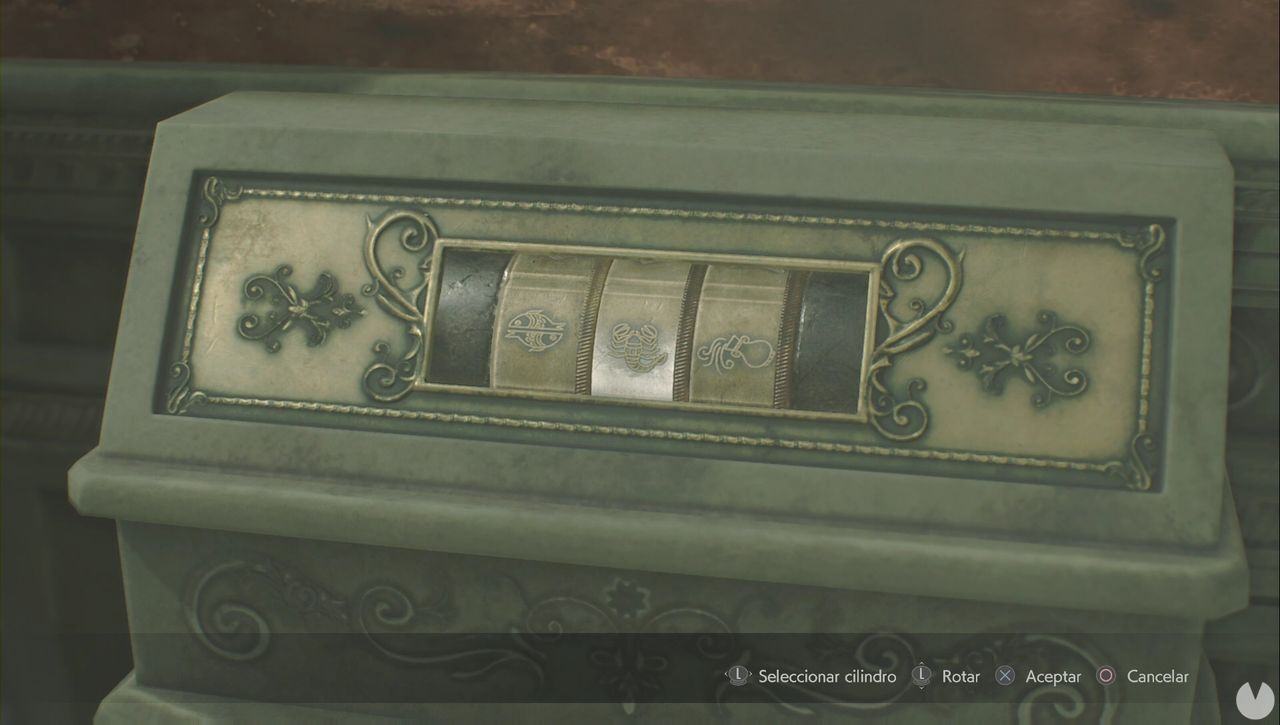
You’ll receive the Unicorn Medallion, which must be placed in the statue in the center of the Main Hall.
The Unicorn Statue solution in the 2nd Run is: twins, scales, and seahorse.
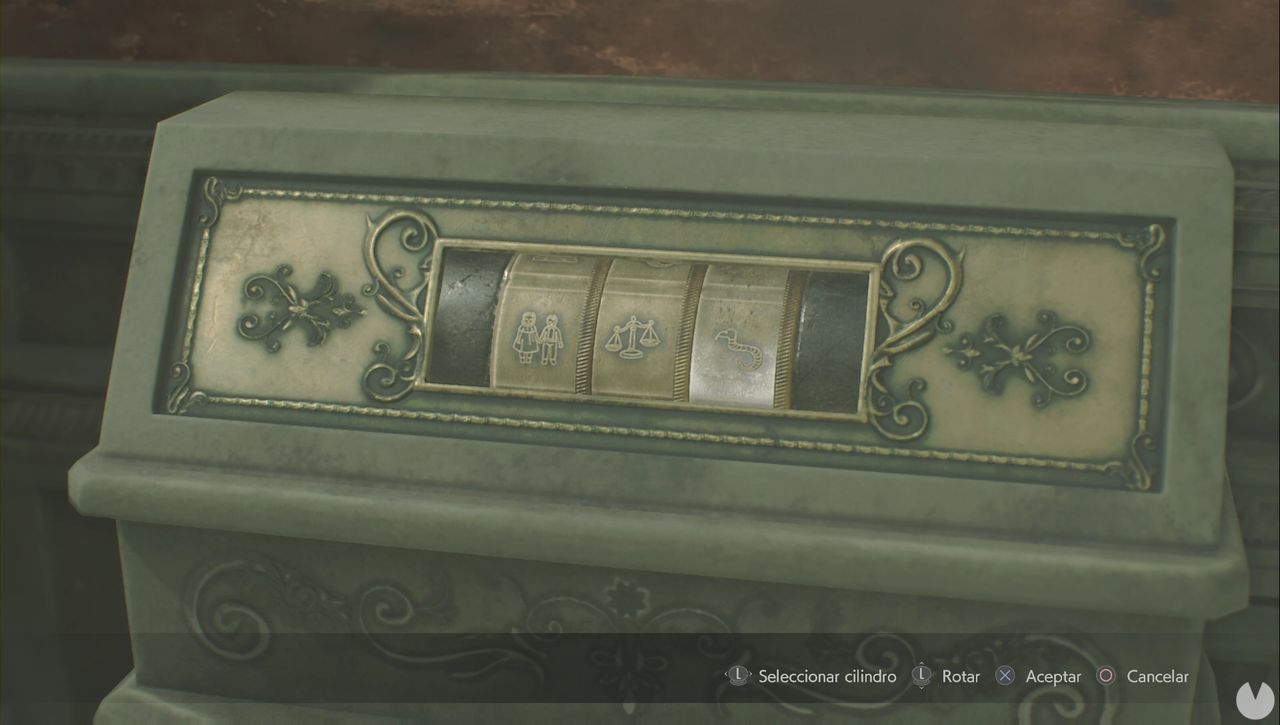
Once you have the Detonator, you can blow up the explosives in the West Storage Room on the third floor. The statue is behind them, and its dials are badly damaged, so use the image below as a guide. The solution is woman, bow, and snake.
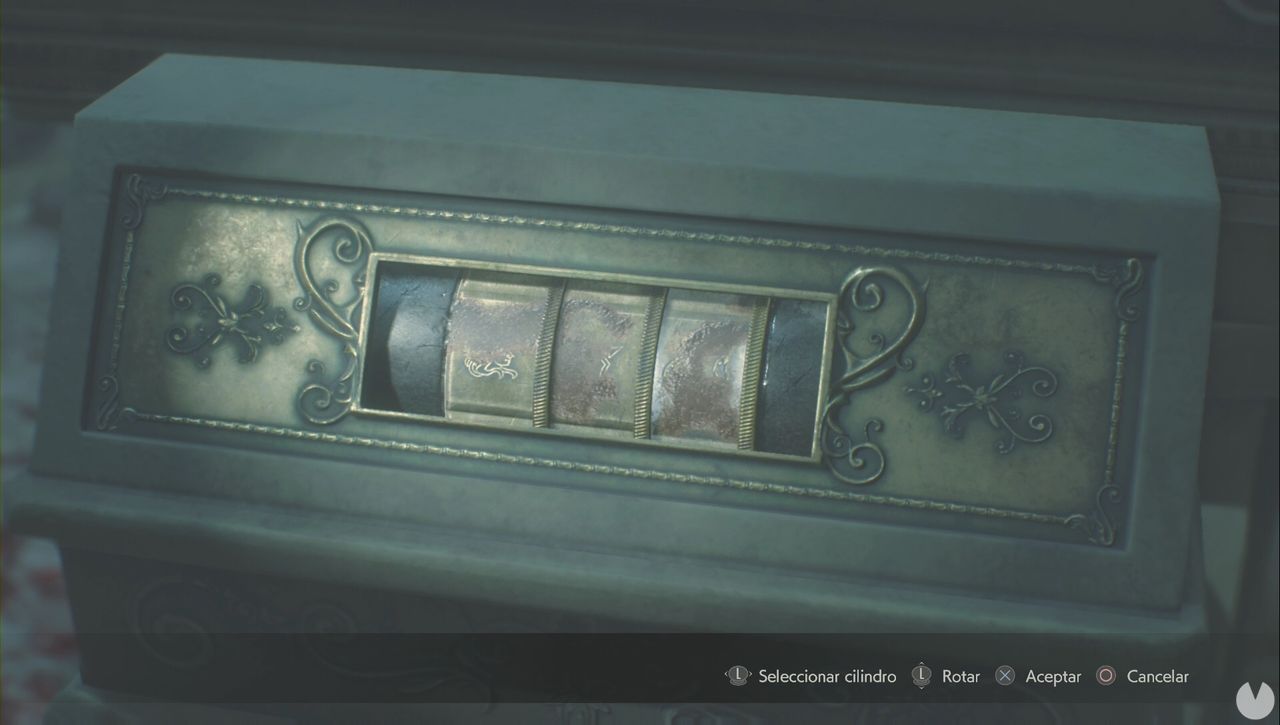
The Maiden Statue solution in the 2nd Run is: ram, harp, and bird.
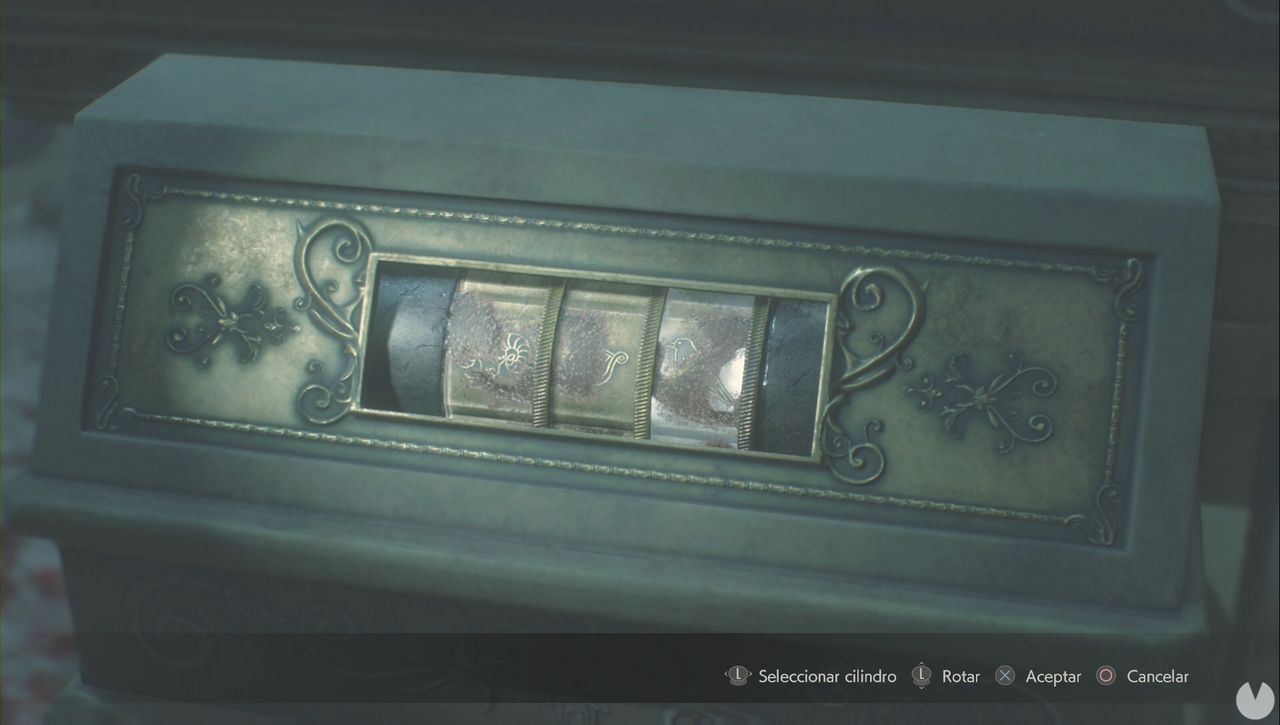
Once you have the Square Crank and can enter the Parking Garage Generator Room, you’ll have to solve a puzzle at the back. Simply flip switches three and four up, counting from left to right.
In the 2nd Run, the puzzle is randomized and may have a different solution each time you play.
Once you have the Jack Handle, obtained in the Records Room during The Records Room section, you’ll be able to move the bookshelves. After using the jack, simply move all the bookshelves to the right to create a path across.
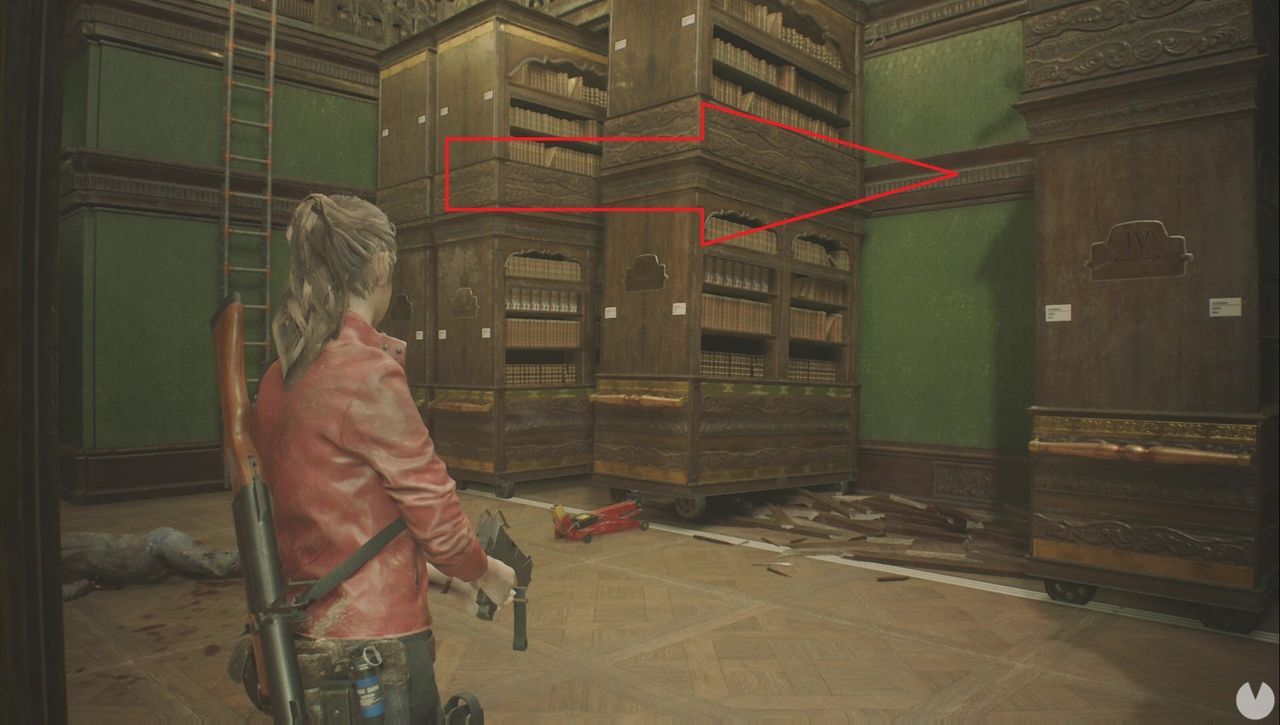
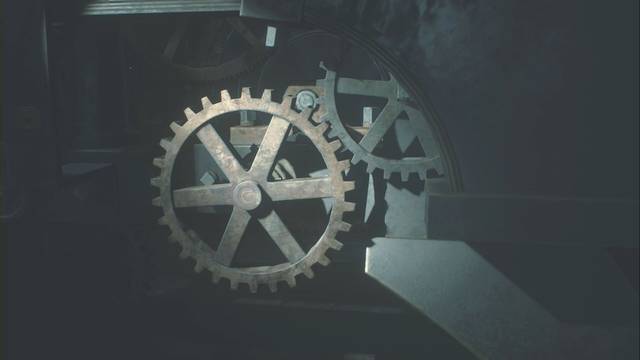
Once you reach the Clock Tower during the final part of this chapter, the solution is fairly straightforward. You’ll need the Large Gear that you should have picked up in The East Side of the Police Station. Place it in the mechanism beside the table on the ground floor.
This will lower a staircase. Go upstairs, take the Small Gear, head back down, and place it in the mechanism in front of you. Then retrieve the Large Gear and place it where the Small Gear was originally located.
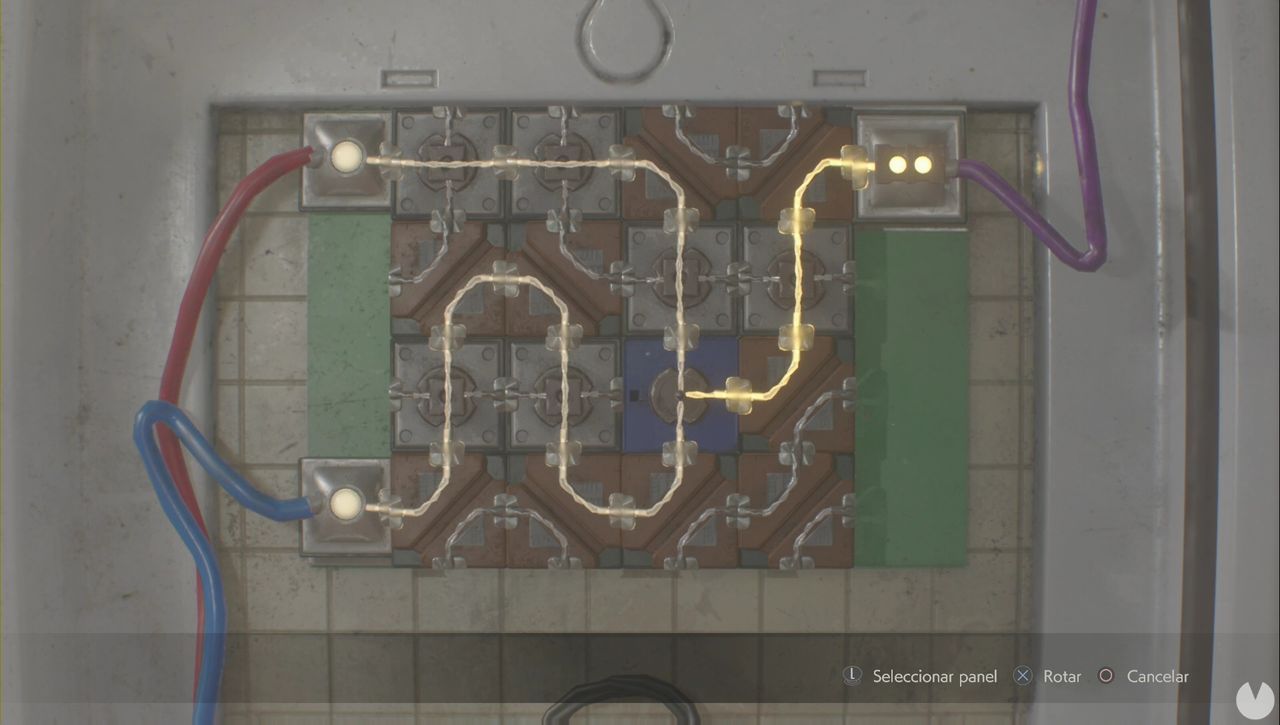
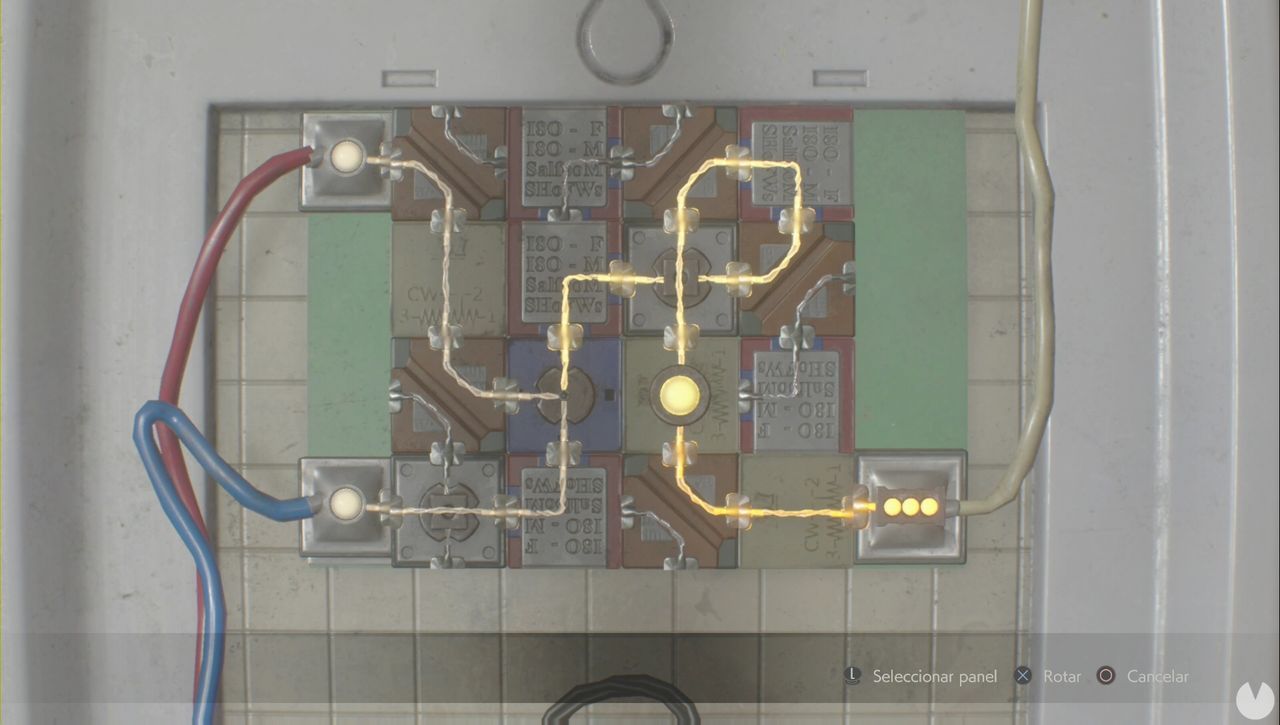
Once you have the two Electronic Parts needed for the Private Collection Room, you’ll have to connect the circuit. The easiest way to do this is to work backwards, starting from the purple wire.
If you still can’t solve it, this is the correct solution:
In the 2nd Run, the solution is as follows:
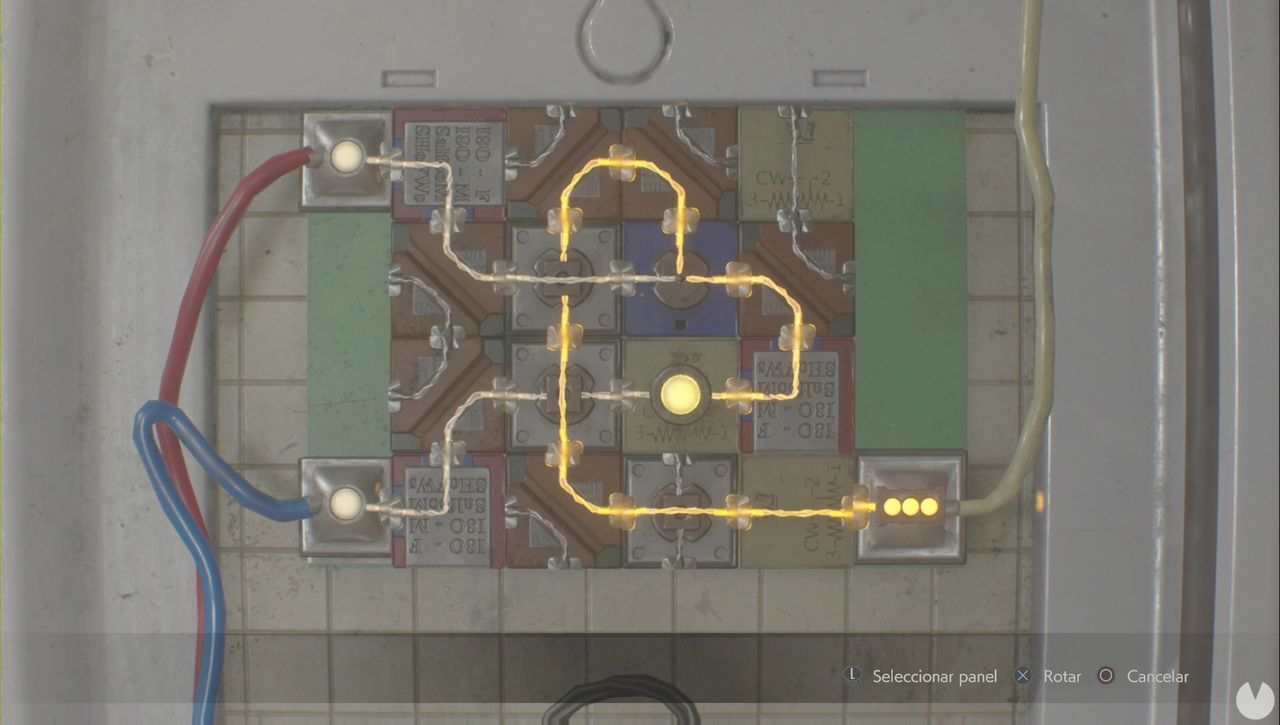
This works just like the previous puzzle. Start from the end and work backwards to make things easier.
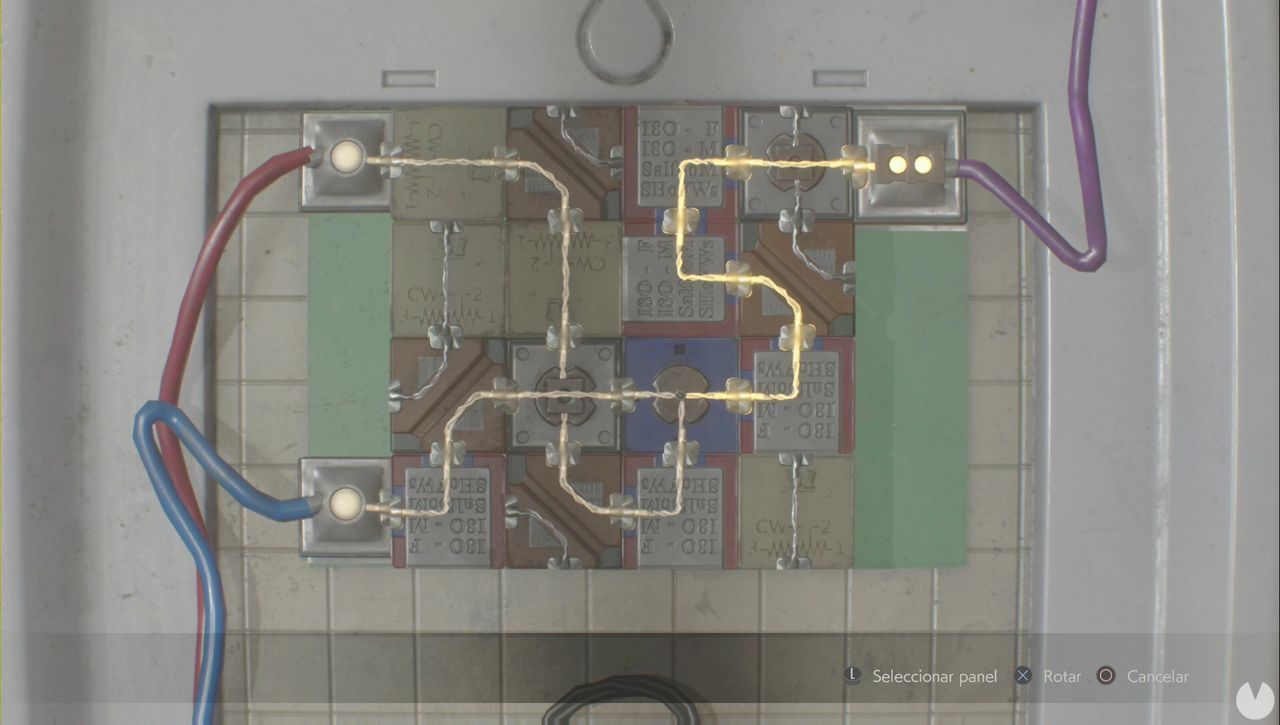
In the 2nd Run, the solution is as follows:
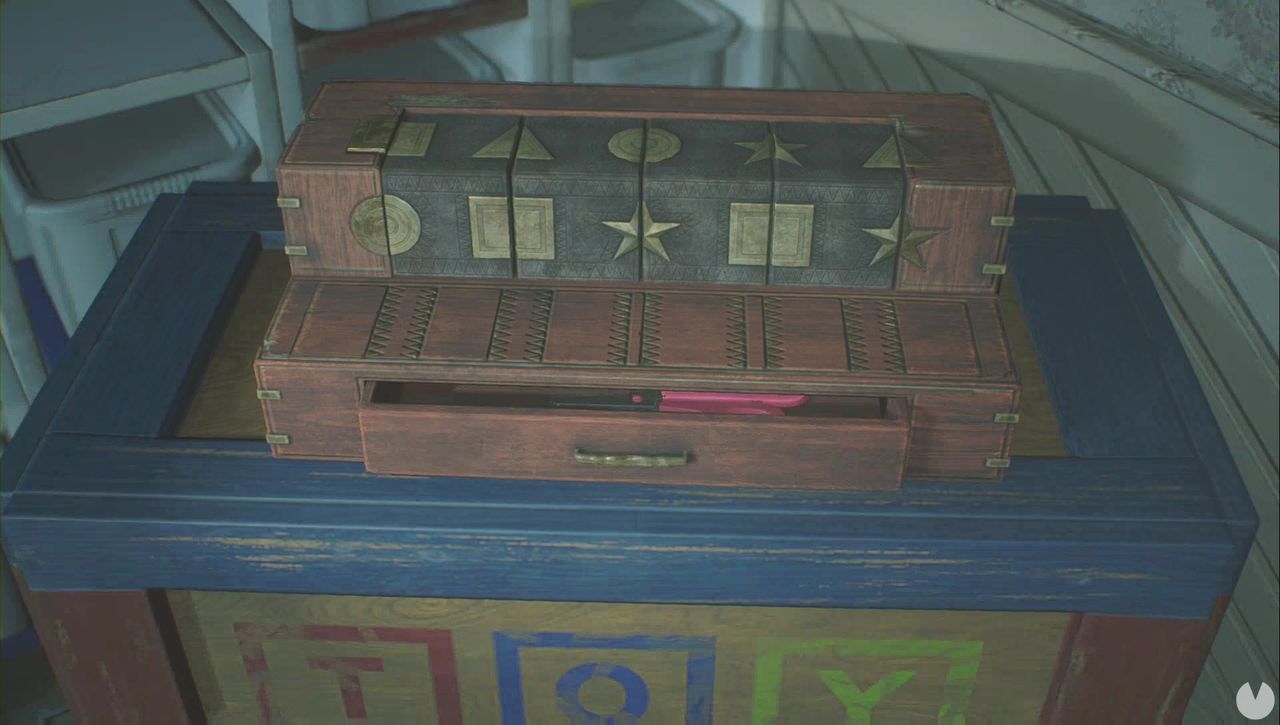
To solve this puzzle, pick up the Picture Block hidden inside the doll in the room where you begin. Then use it on the device to the left of the door. You need to make all the shapes match by rotating the blocks and placing them in the correct positions.
The trick is to find the two end pieces first. Remember that both their front and top faces need to match. Once you’ve identified those two pieces, the rest is a breeze. If you’re having trouble, move the blocks until the complete pattern looks like this:
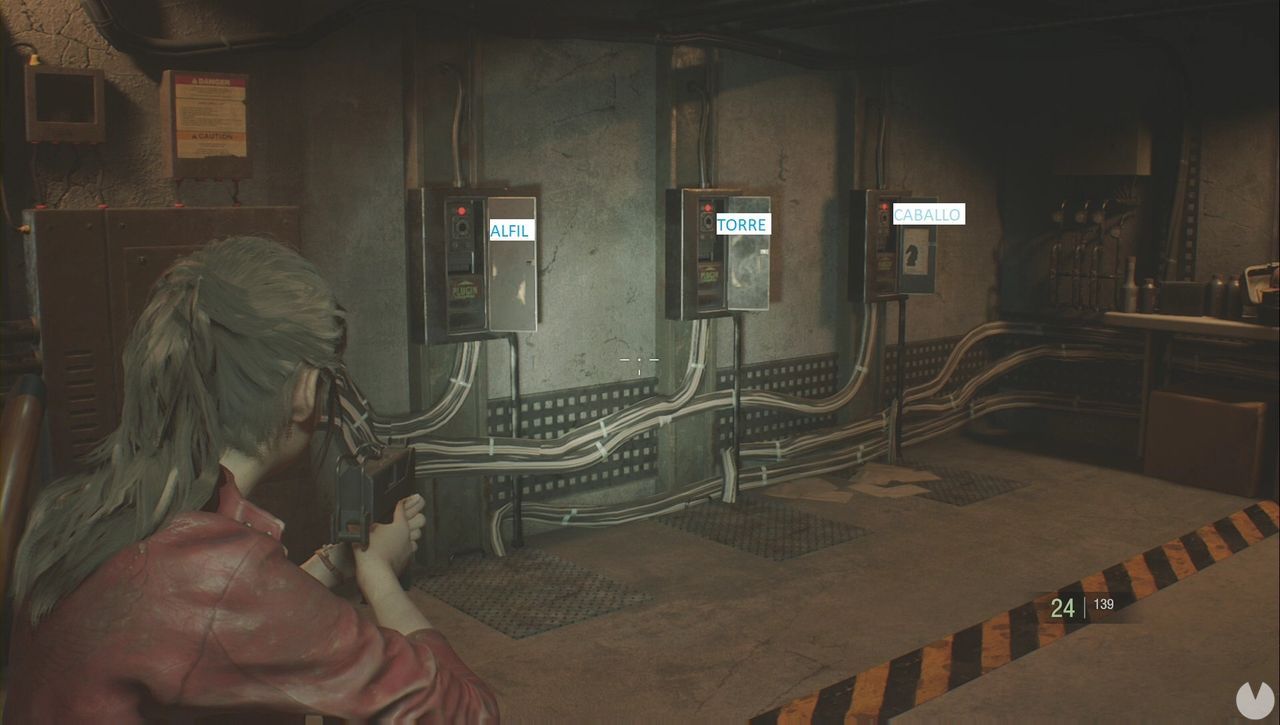
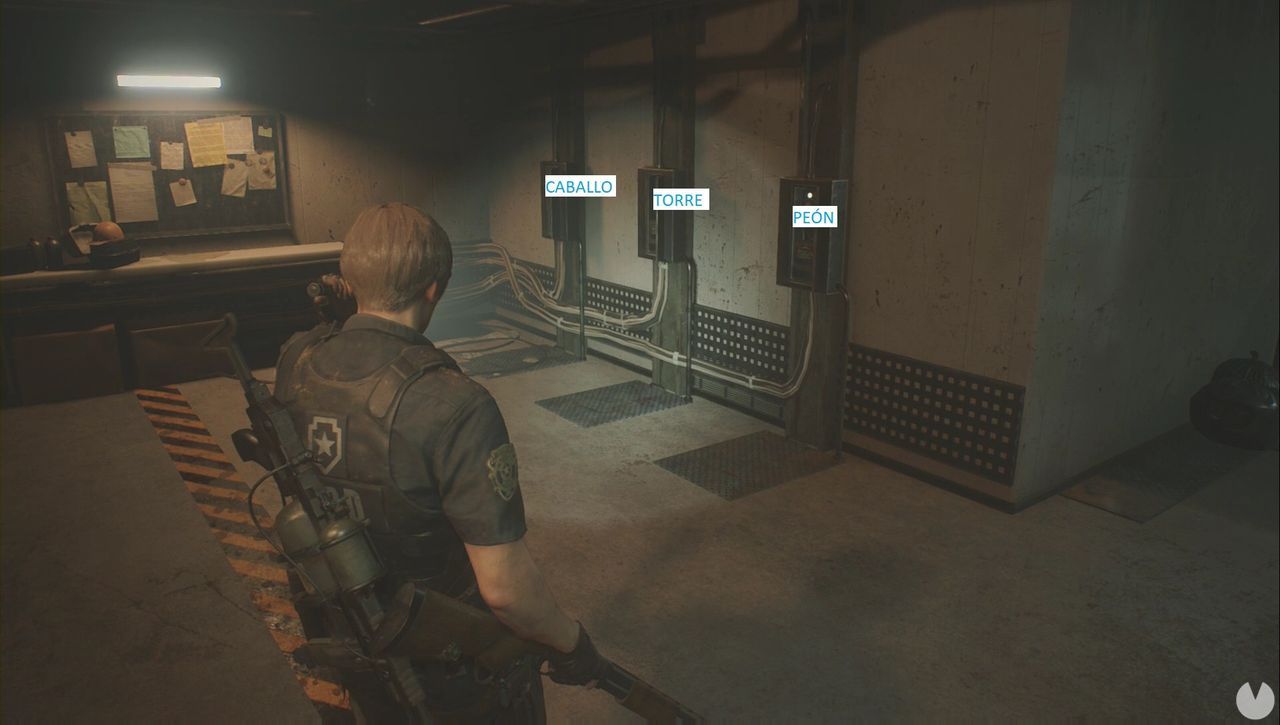
First, you need to obtain the King, Queen, and Rook Plugs. You’ll find the Pawn, Bishop, and Knight Plugs in the Monitor Room, where the puzzle itself is solved. Place them as follows.
On the left: starting from the far end, place the Knight, Rook, and Bishop Plugs.
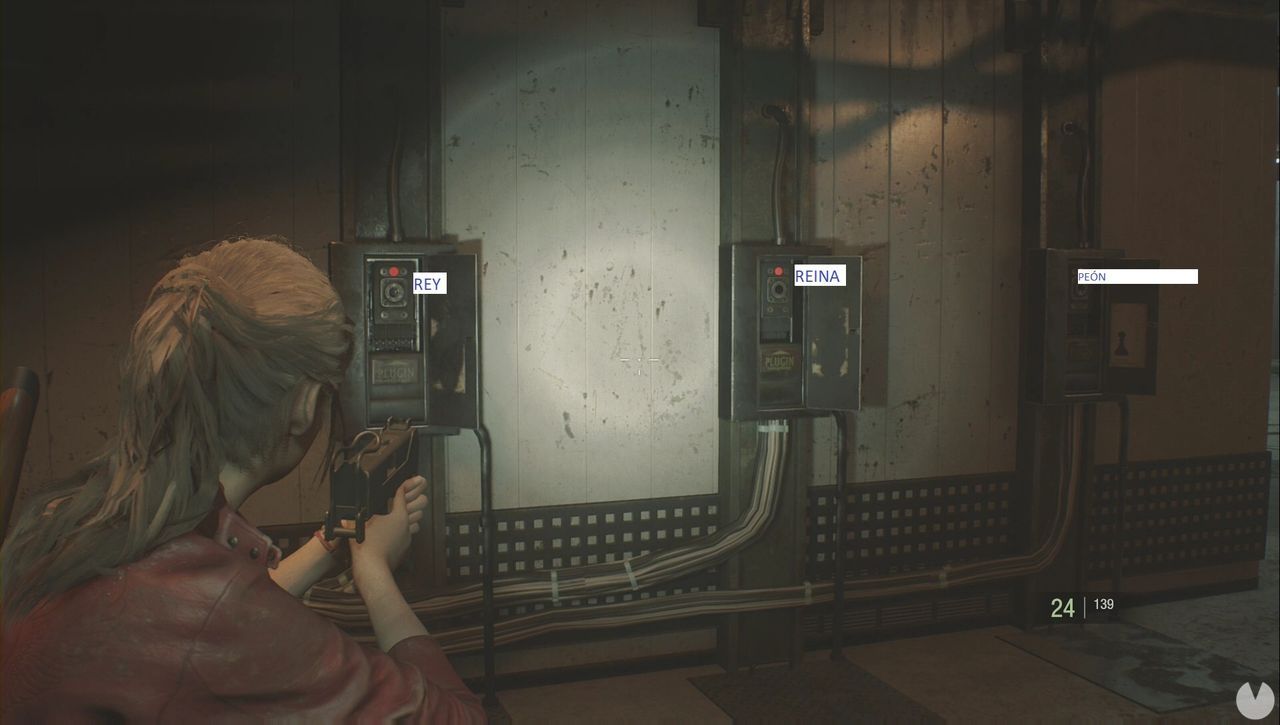
On the right: again starting from the far end, place the King, Queen, and Pawn Plugs.
The solutions for the 2nd Run are as follows:
On the left: starting from the far end, place the King, Bishop, and Queen Plugs.
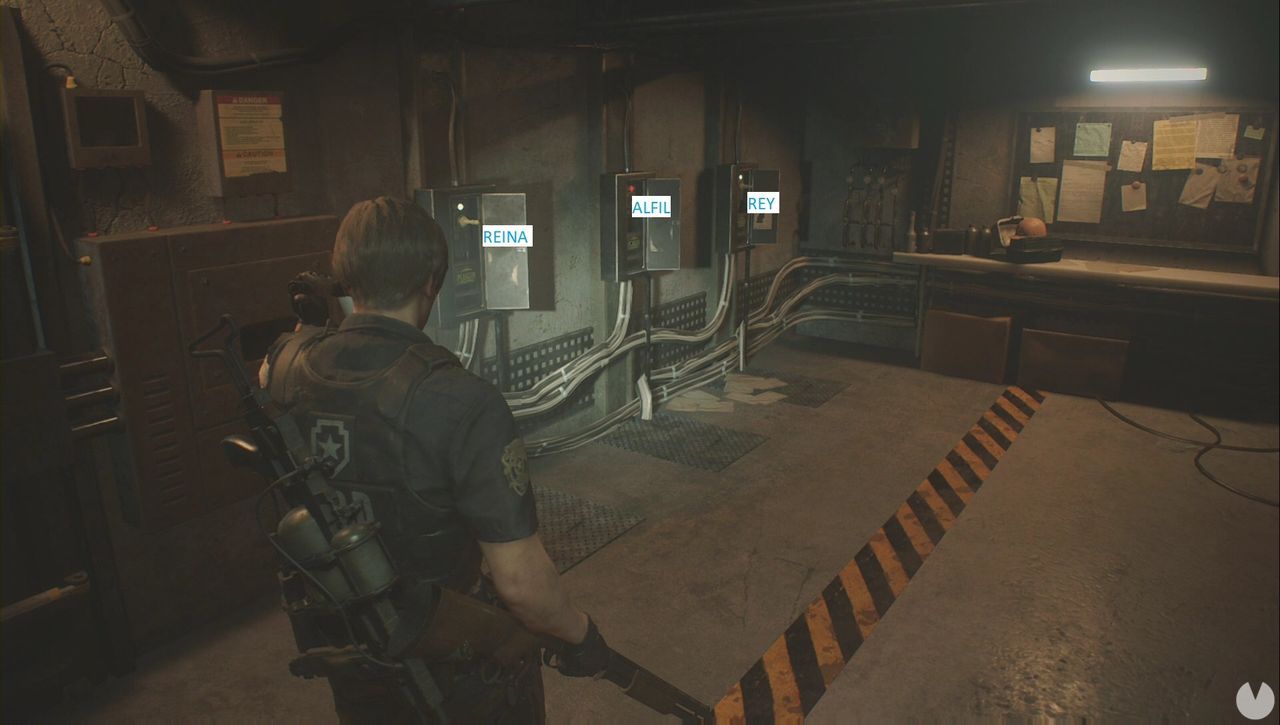
On the right: starting from the far end, place the Knight, Rook, and Pawn Plugs.
You’ll find this puzzle in the Main Power Room after solving the previous one. It’s very straightforward: simply flip switches 1, 2, and 4.
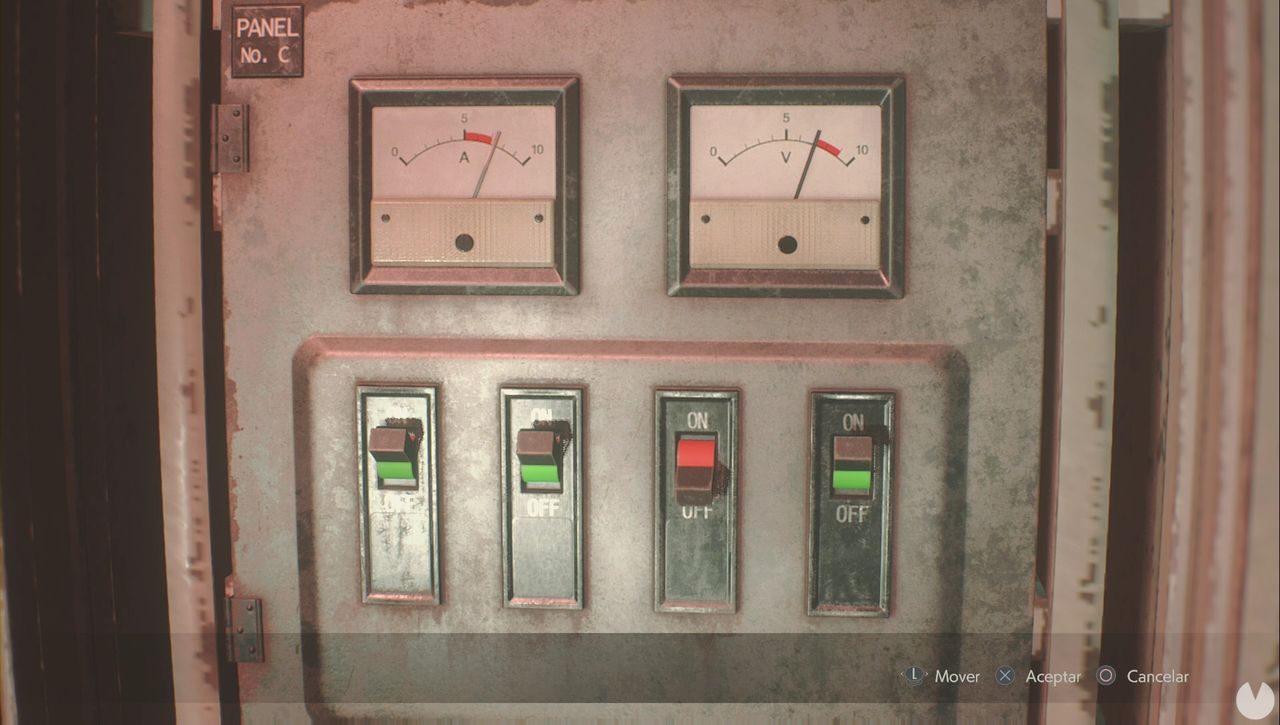
In the 2nd Run, the solution is randomized.
Once you reach the Greenhouse Control Room, you’ll see a terminal on the west wall where you need to enter symbols instead of numbers. There are two sequences to enter. The first is:
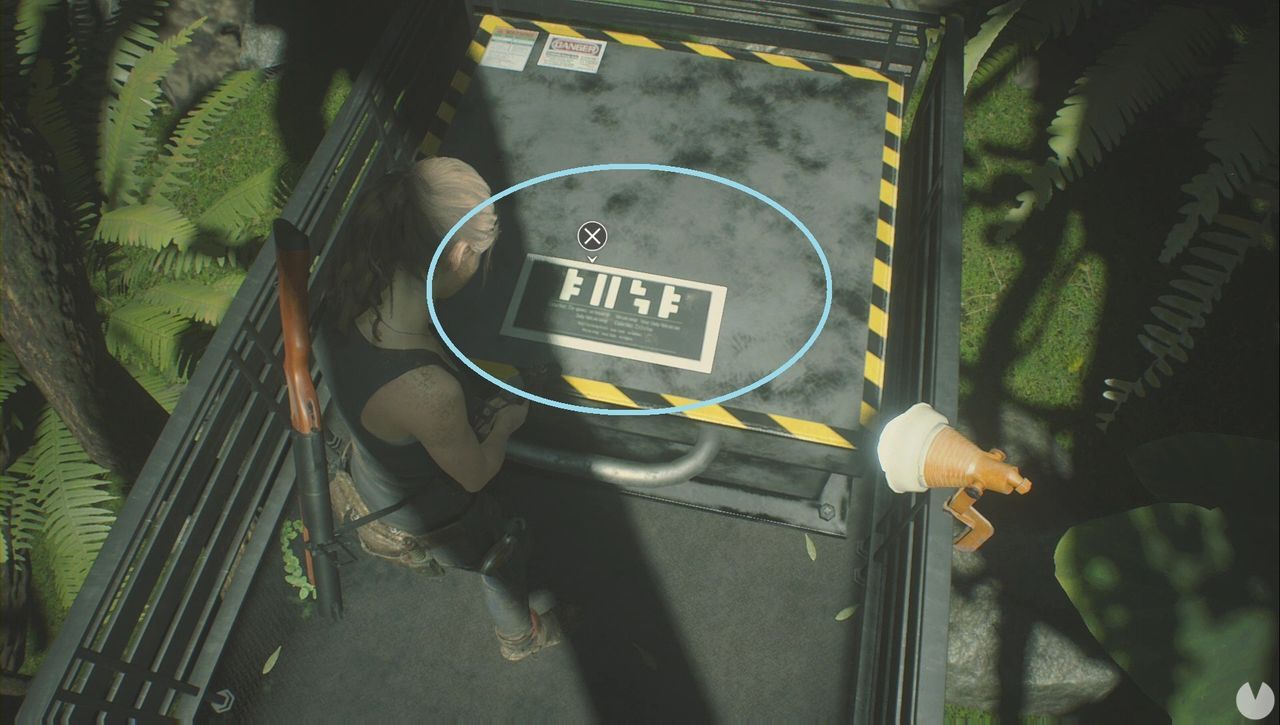
The second is:
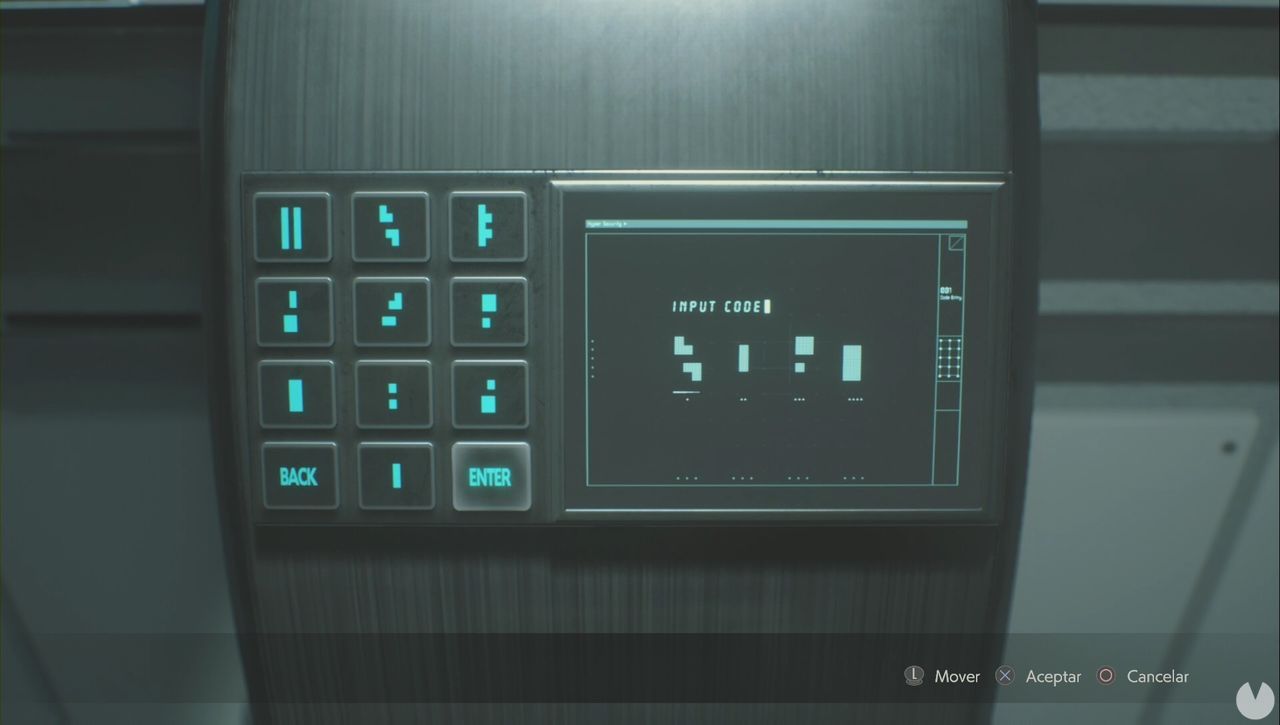
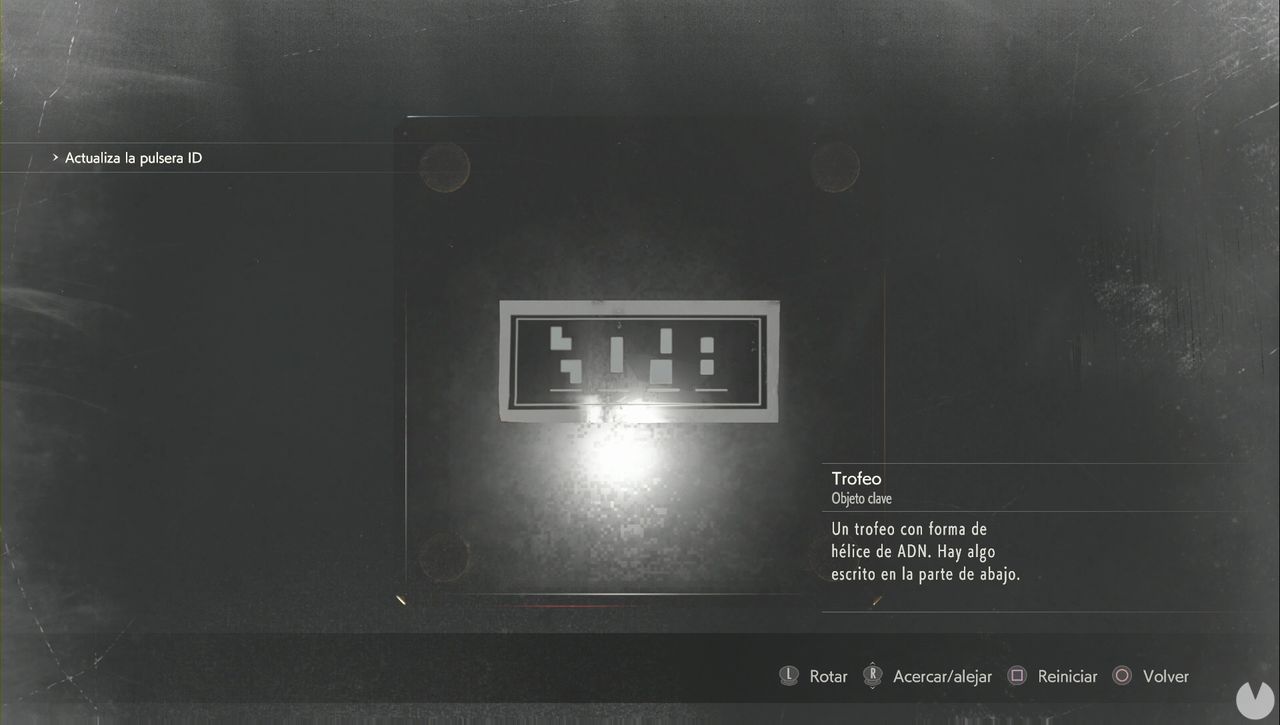
The codes in the 2nd Run are as follows:
For the hatch:
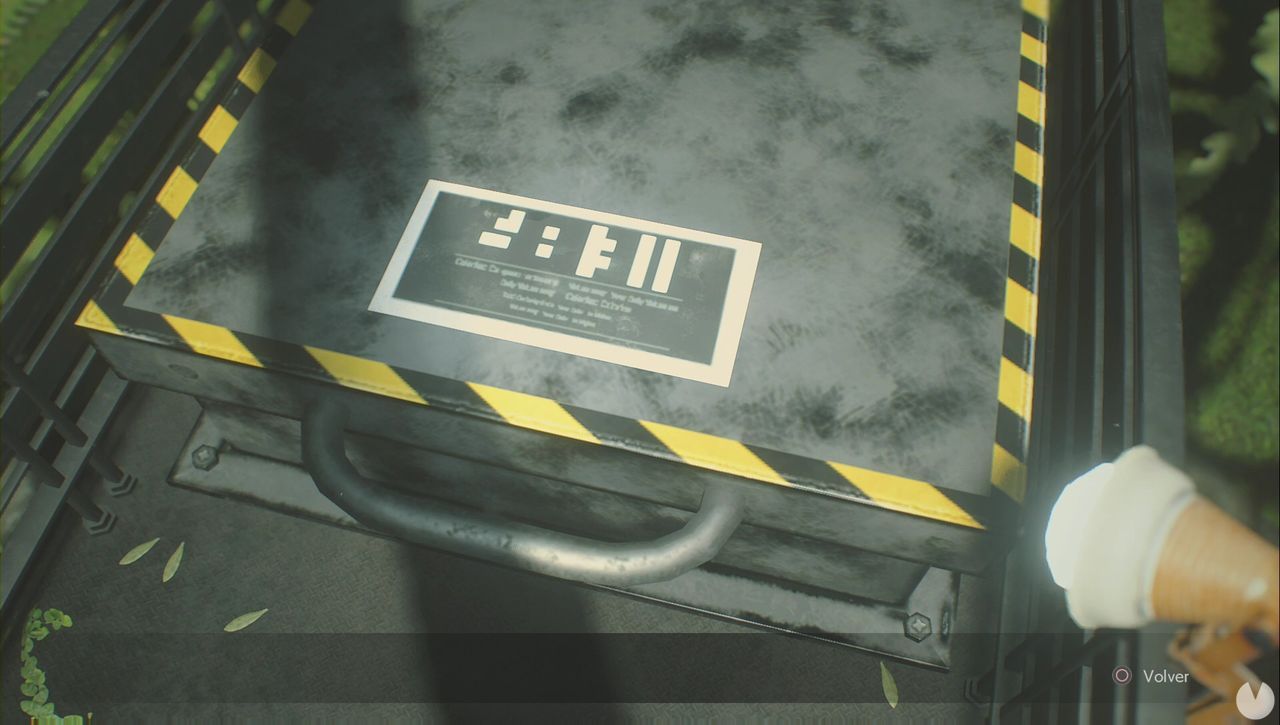
For the herbicide machine:
In the Drug Testing Lab, after solving the previous puzzle, you’ll have to create the herbicide by inserting the empty cartridge you picked up in the control room. You now need to mix the liquids to produce the herbicide.
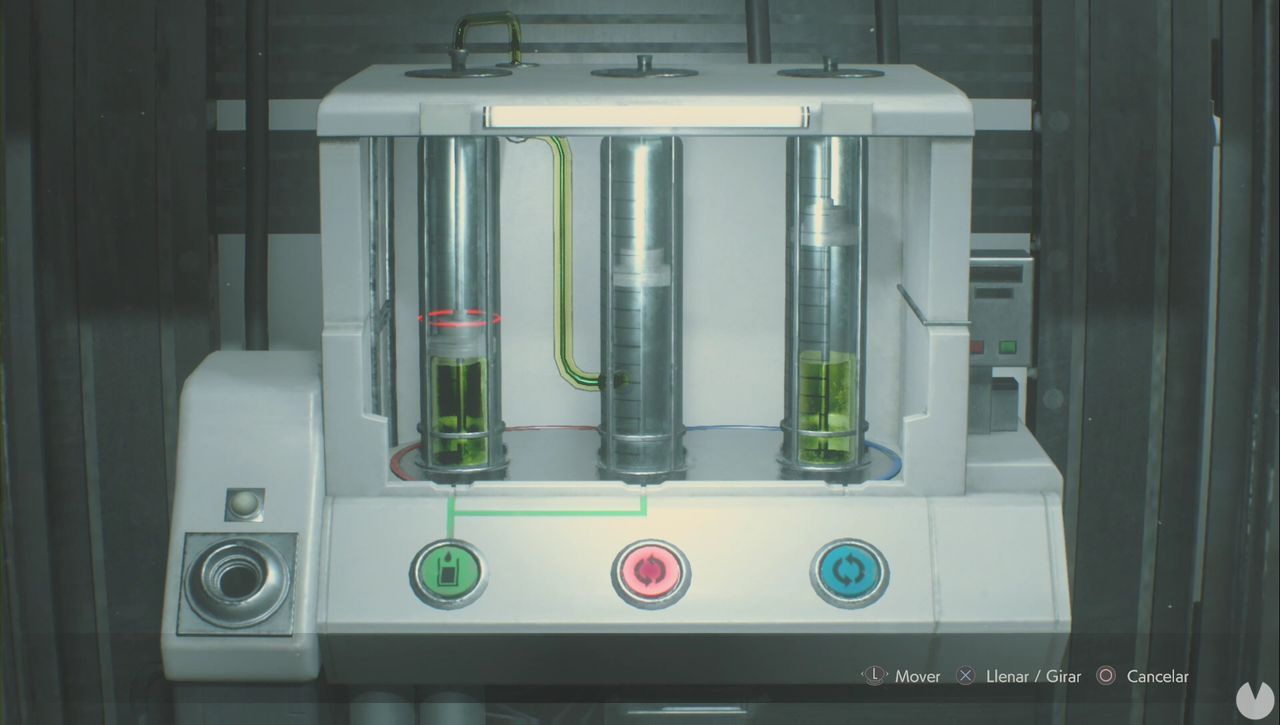
This is a classic liquid-transfer puzzle. It works as follows:
Since the solution below won’t work if you’ve already moved anything, this is what you need to do:
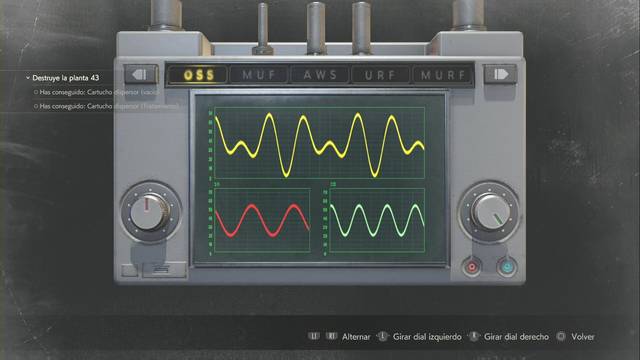
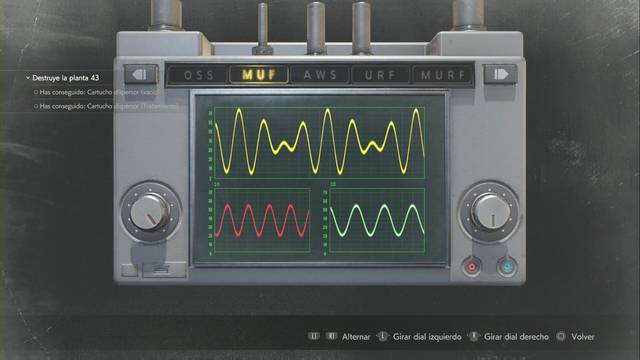
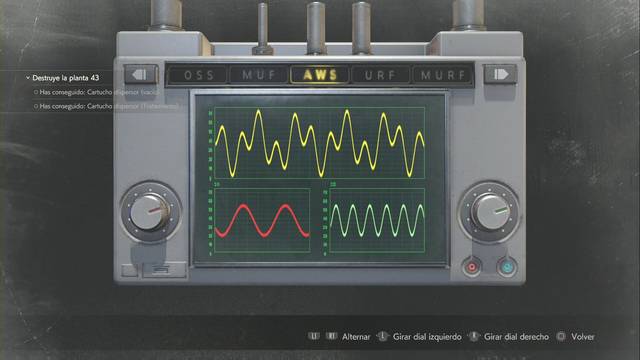
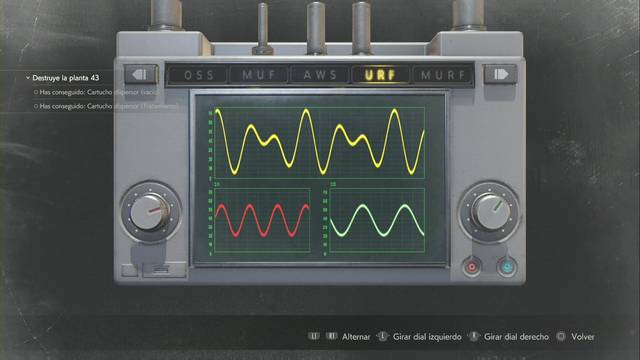
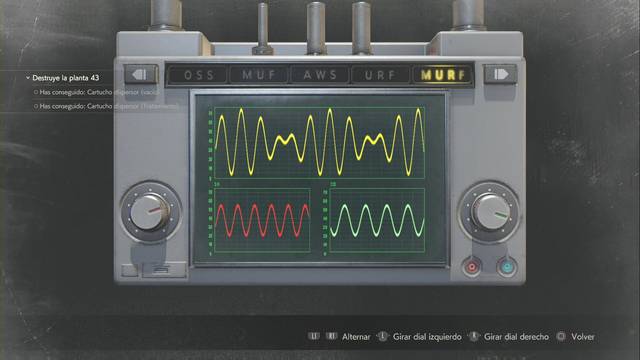
After climbing the stairs at the western end of the Greenhouse basement and reaching the room connected to the Lobby, you’ll find the Signal Modulator on the west wall. Examine it to activate the "puzzle."
Note: in the 2nd Run, you’ll find the Signal Modulator as soon as you leave Reception, beside the U.S.S. soldier’s body and before activating the bridge for the first time.
It works quite simply. There are two dials, one on the left and one on the right, controlled by the thumbsticks—the left stick controls the left dial and the right stick controls the right one. Move the left stick left and the left dial turns left; move it right and the dial turns right. The same applies to the right stick and dial.
However, it’s both a puzzle and a key item used to interact with the Circuit Breakers in the Nap Room (B1, western end), the Lounge (B2, southeast), and the Biotesting Lab (West Area). Check the frequency shown on each Circuit Breaker—OSS, MUF, AWS, URF, or MURF—then examine the Signal Modulator, select the correct frequency, and use it on the Circuit Breaker.
To make things easier, here are the solutions for each frequency. Pay close attention to the position of the dials.