Throughout Resident Evil 4 Remake, you'll have to solve a large number of puzzles and brainteasers. Most of them are mandatory, although a couple are optional. To make sure you don't get stuck, this section provides all the solutions and explains what you need to do to find them. Bear in mind that some puzzles have different solutions depending on the difficulty level. This guide covers every solution and explanation you'll need to overcome the puzzles found throughout each area.
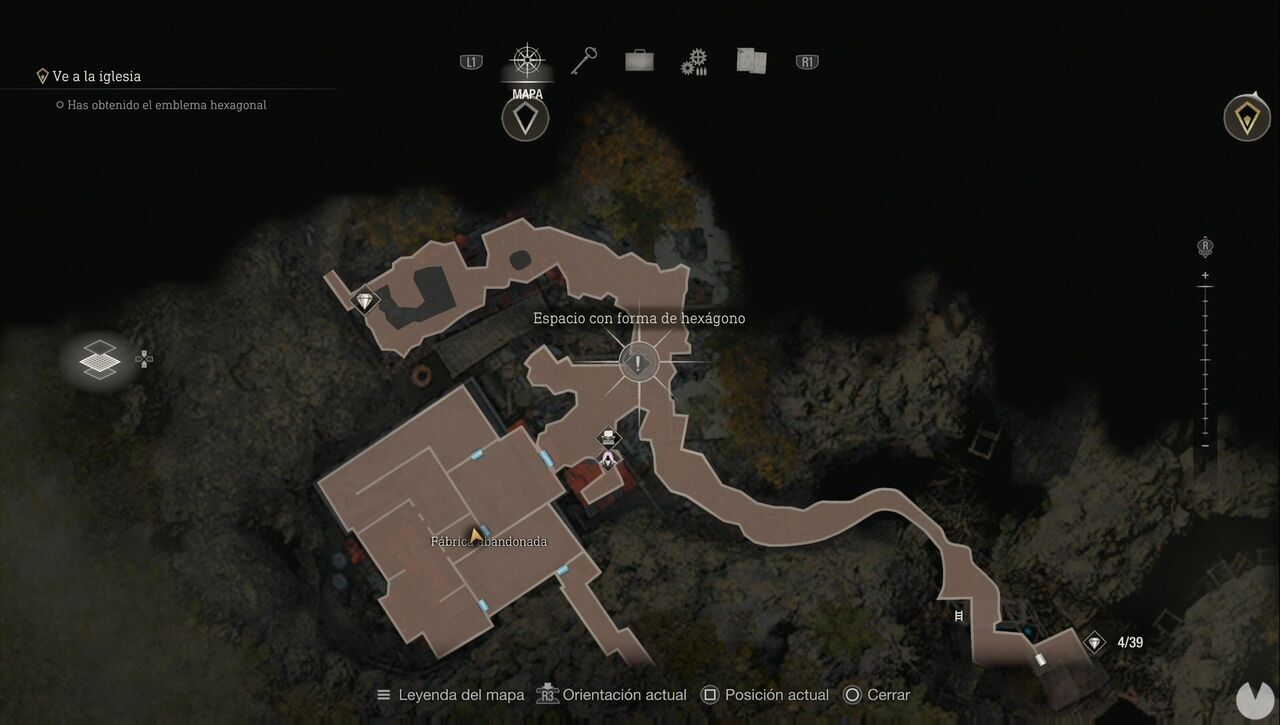
This puzzle appears in Chapter 2, in the Abandoned Factory, after obtaining the Hexagonal Emblem in the Valley. You'll need to use this key item on the Hexagonal Slot to move forward.
To solve the puzzle and continue, you need to position the eagle facing you so that it appears as a mirror image of the one on the door. In other words, the tips of its wings should point upward and its beak should face right.
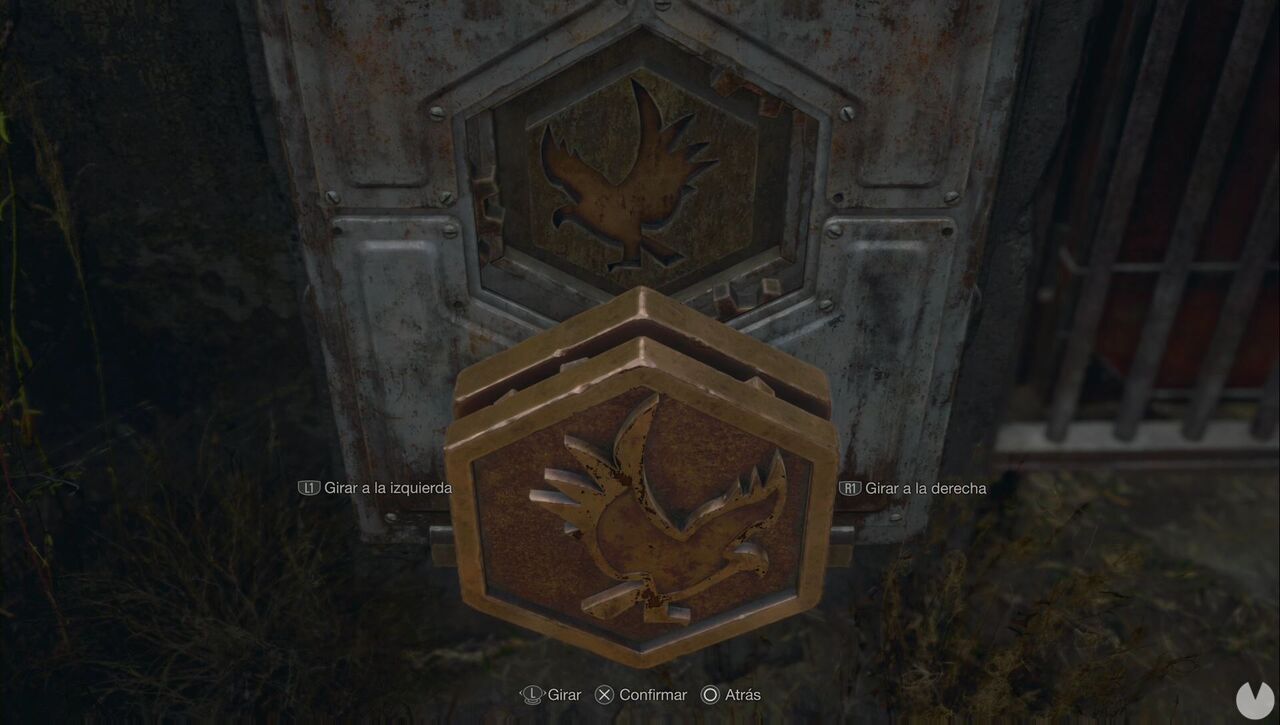
Now simply flip it horizontally so that it fits into the slot and opens the door. You can then continue with the story.
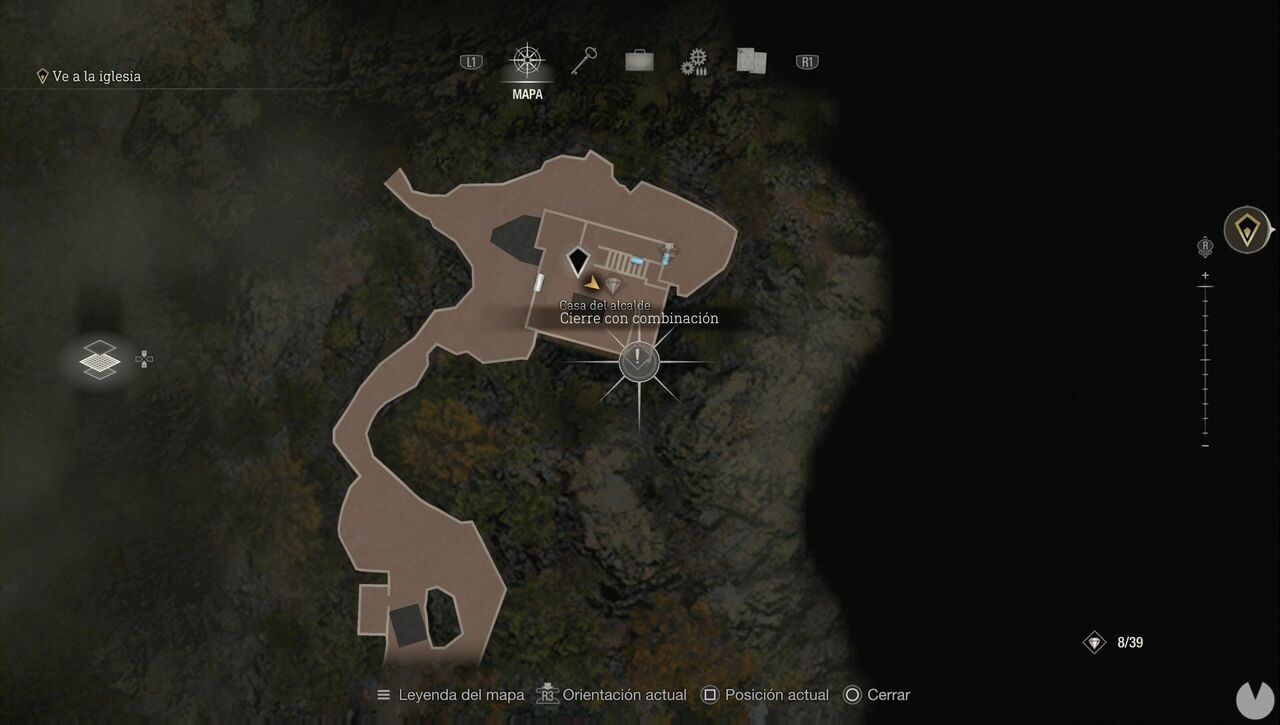
You'll encounter this puzzle during Chapter 2, inside the Village Chief's Manor. It's a cupboard in the southeast corner of the ground floor.
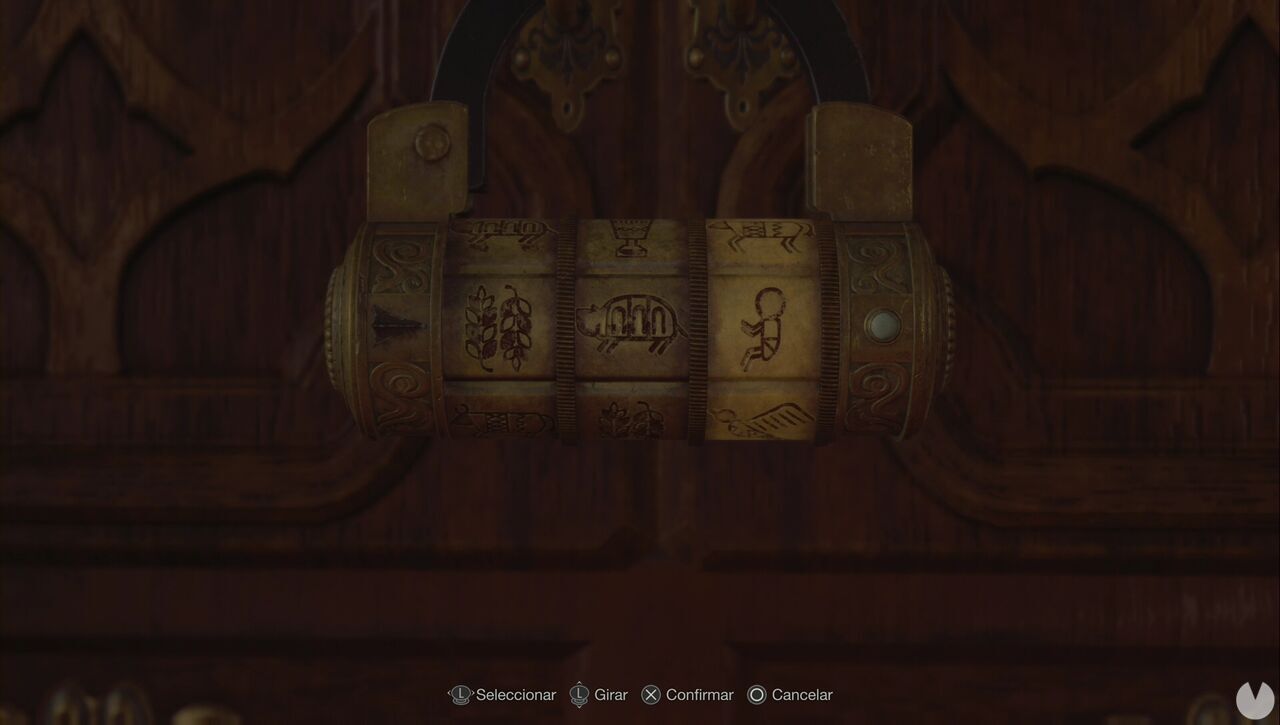
You'll find the solution in the book in the upstairs hallway. To solve the puzzle, turn the dials until they display the wheat, pig, and baby symbols, then press the confirm button. The solution is the same on Hardcore and Professional.
Once the cupboard opens, you can pick up the Crystal Marble, which is used in the next puzzle.
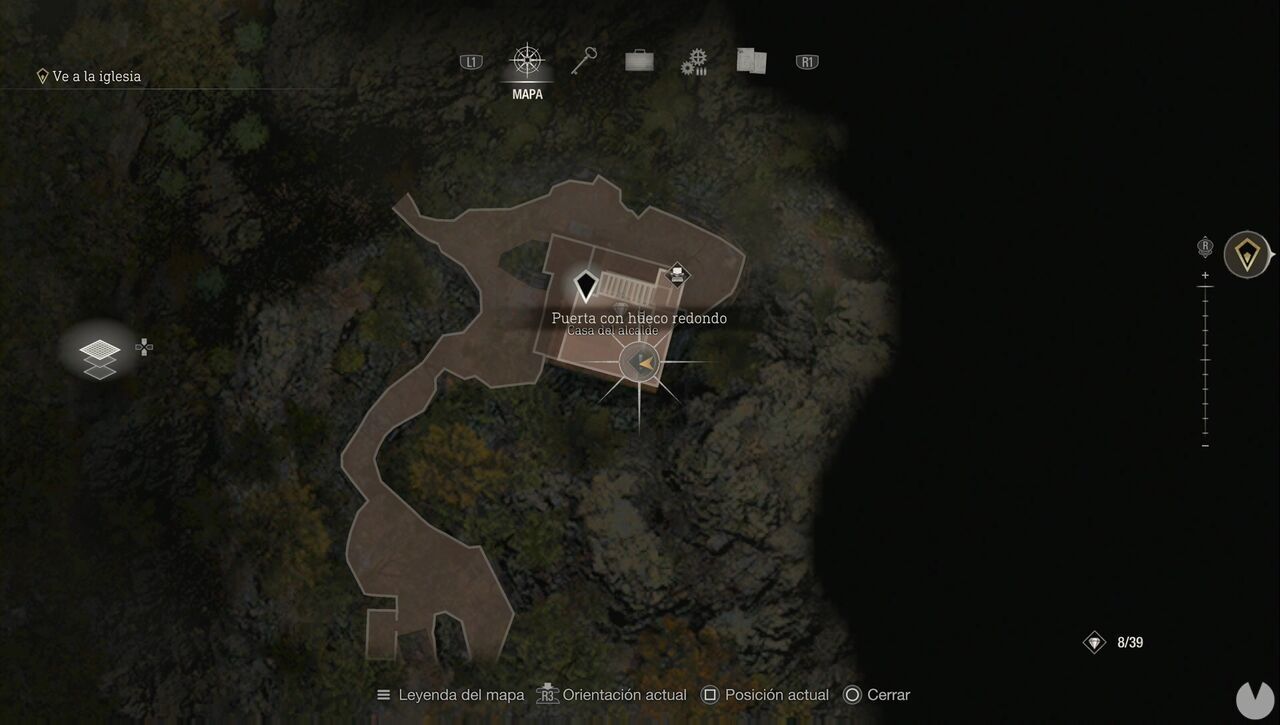
This puzzle appears in Chapter 2, immediately after the previous one, upstairs in the Village Chief's Manor. You need to use the Crystal Marble on the door with a round slot.
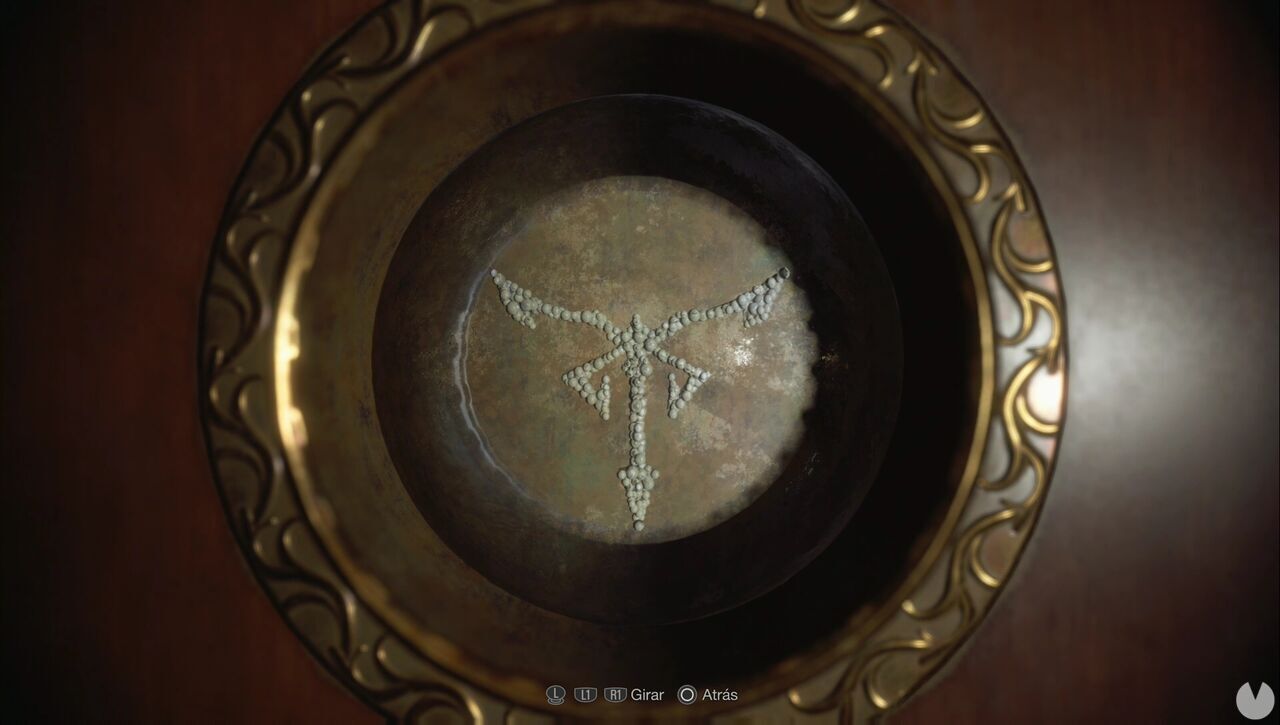
Your goal is to turn and rotate the marble until you form the village symbol, as shown in the solution below. Since the game remembers the position in which you left the marble, we can't provide an exact sequence of movements, as this will depend on how much you've moved it from its starting position.
The door will open, allowing you to examine the room.
This puzzle appears in Chapter 4, in the Large Cave Shrine area.
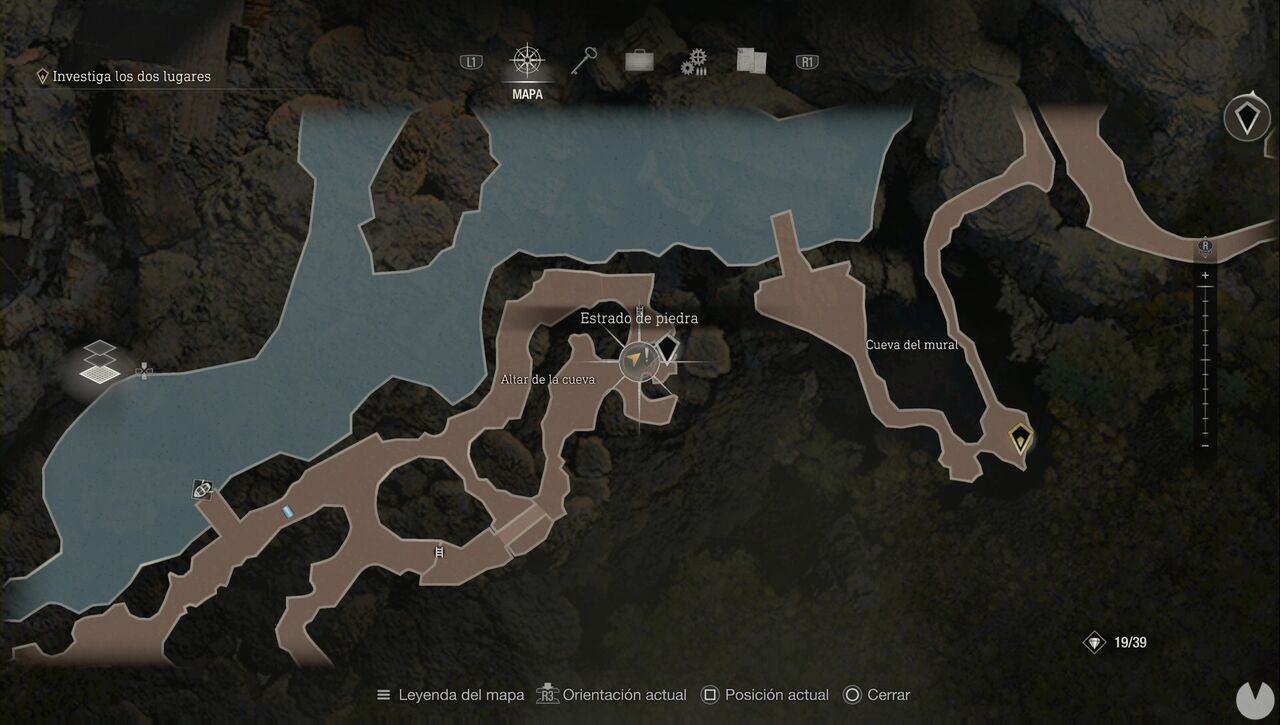
To solve it, press the buttons matching the symbols painted around the cave:
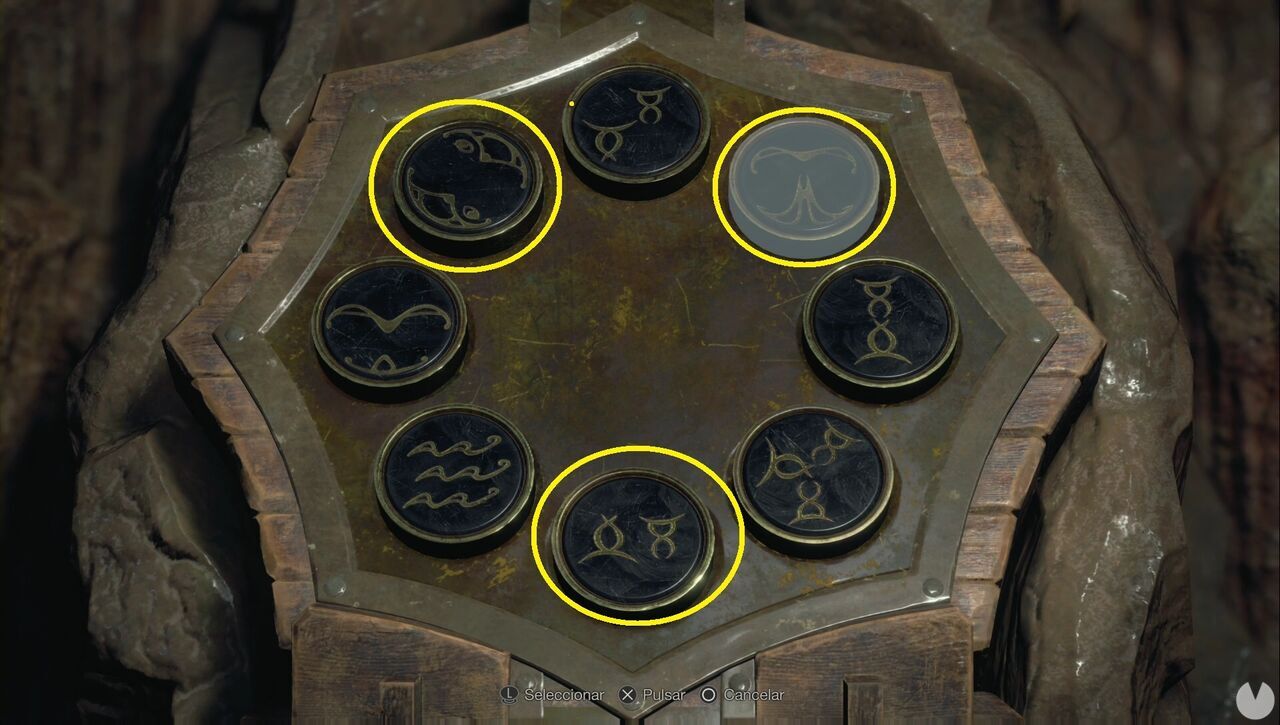
You'll obtain one of the heads needed for the Lake altar.
This puzzle is identical to the previous one and can be found in the northeast corner of the Lake.
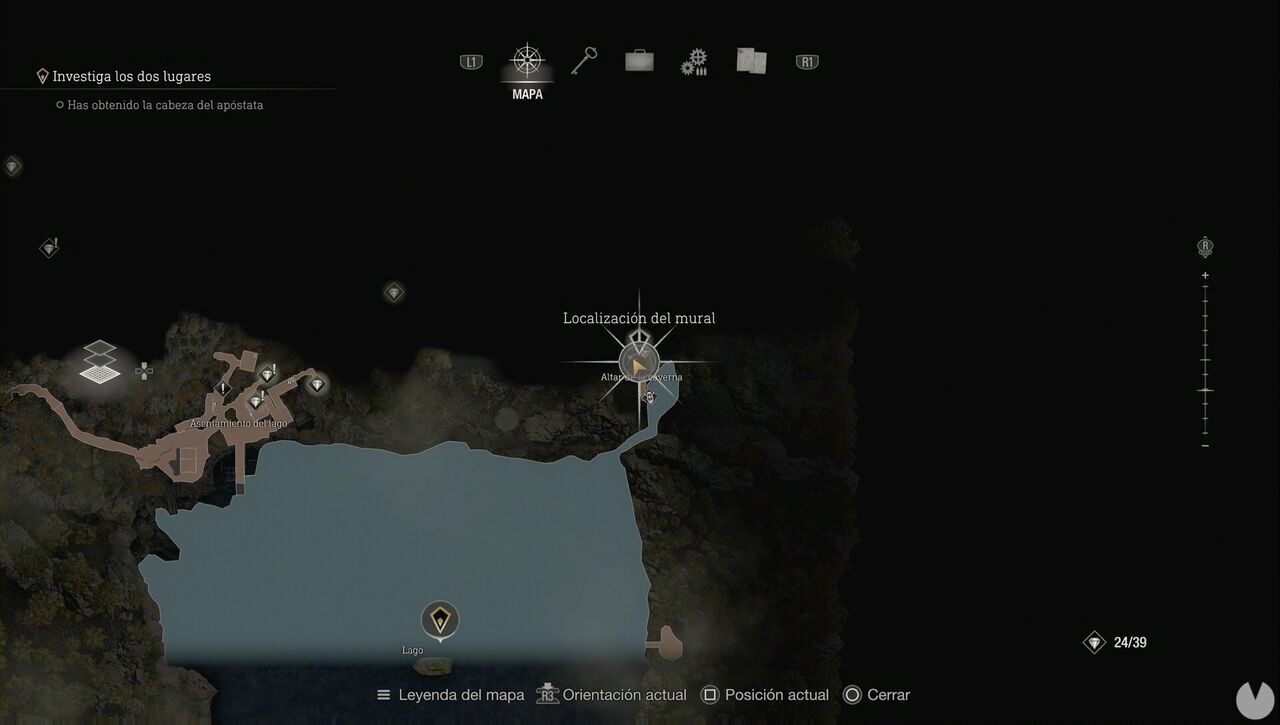
As with the previous puzzle, you'll need to find the solution among the symbols painted around the cave:
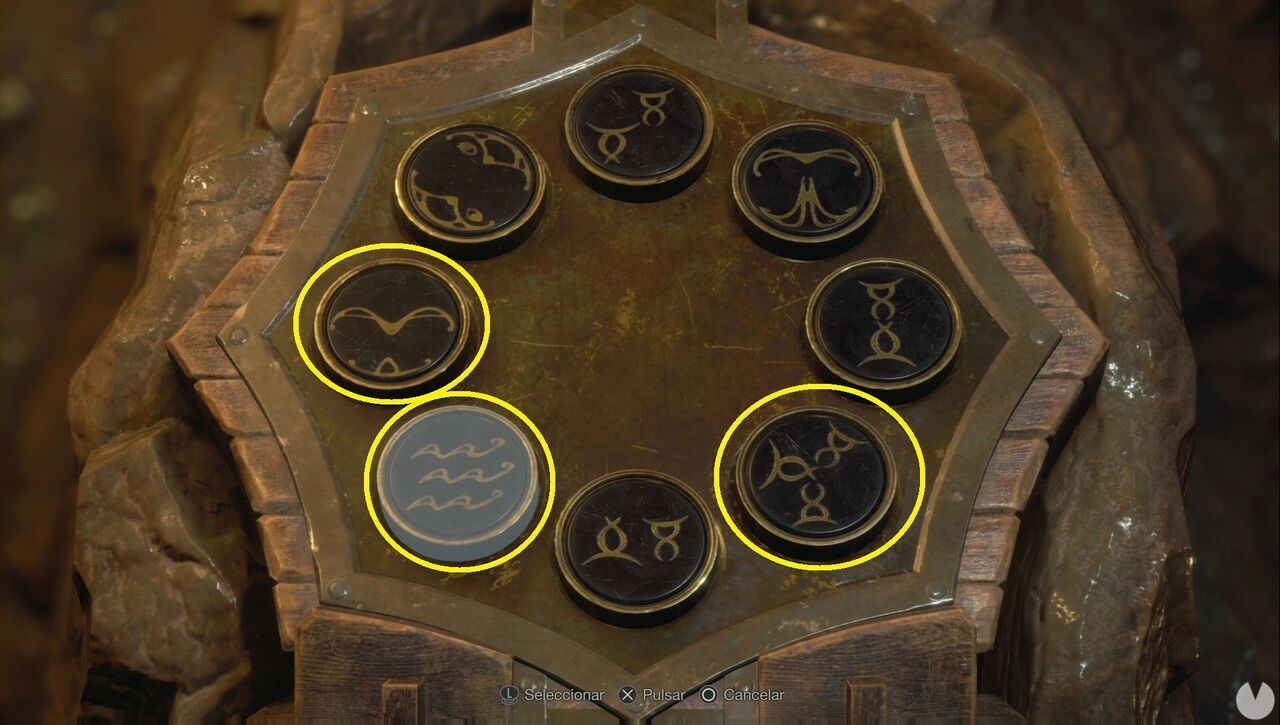
You'll obtain one of the heads needed for the Lake altar.
This optional puzzle can be found on the southwest shore of the Lake.
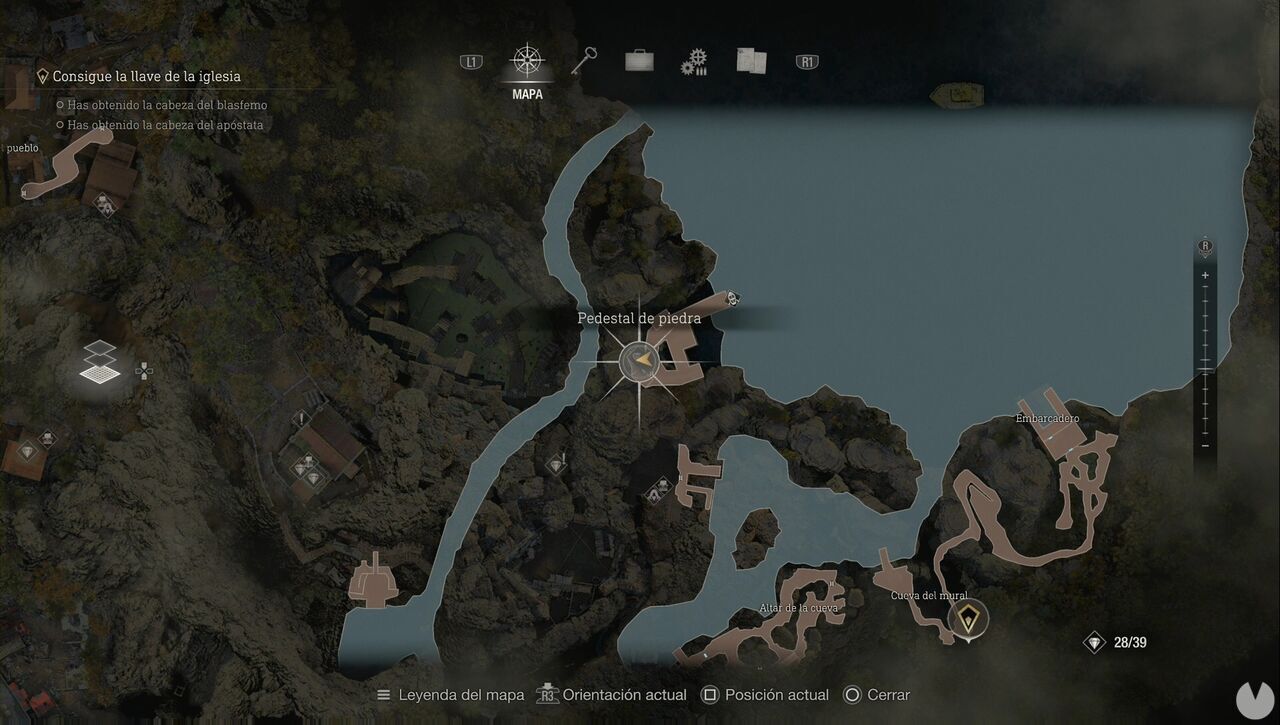
The first thing you need to do is find the three Hexagon Pieces:
[slideshow:1679520796](slideshow:1679520796)
Once you have them, return to the altar, insert the pieces, and take a look at the following image:
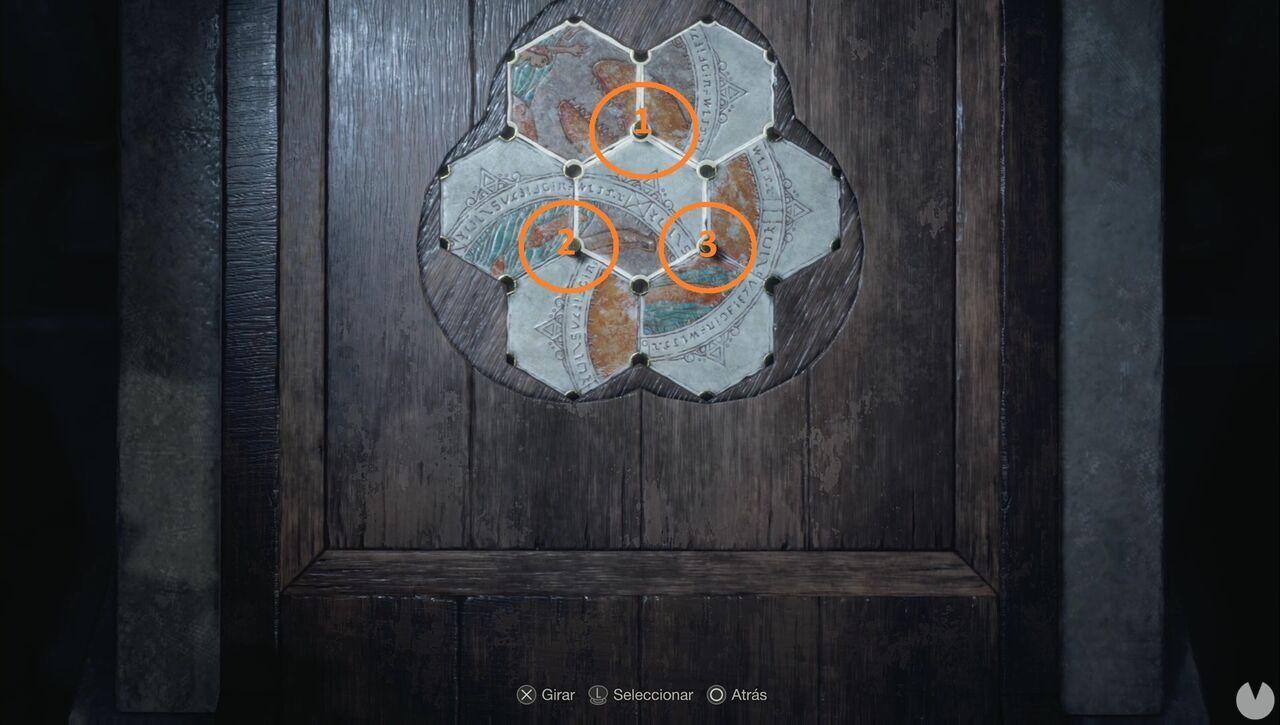
You'll notice that you can only move the pieces in groups of three: the top group (1), the bottom-left group (2), and the bottom-right group (3). You should only need to move groups 2 and 1 to complete the puzzle and obtain the Depraved Idol treasure.
You'll have to solve this puzzle in Chapter 4. First, pull the lever beside the altar to activate the puzzle.
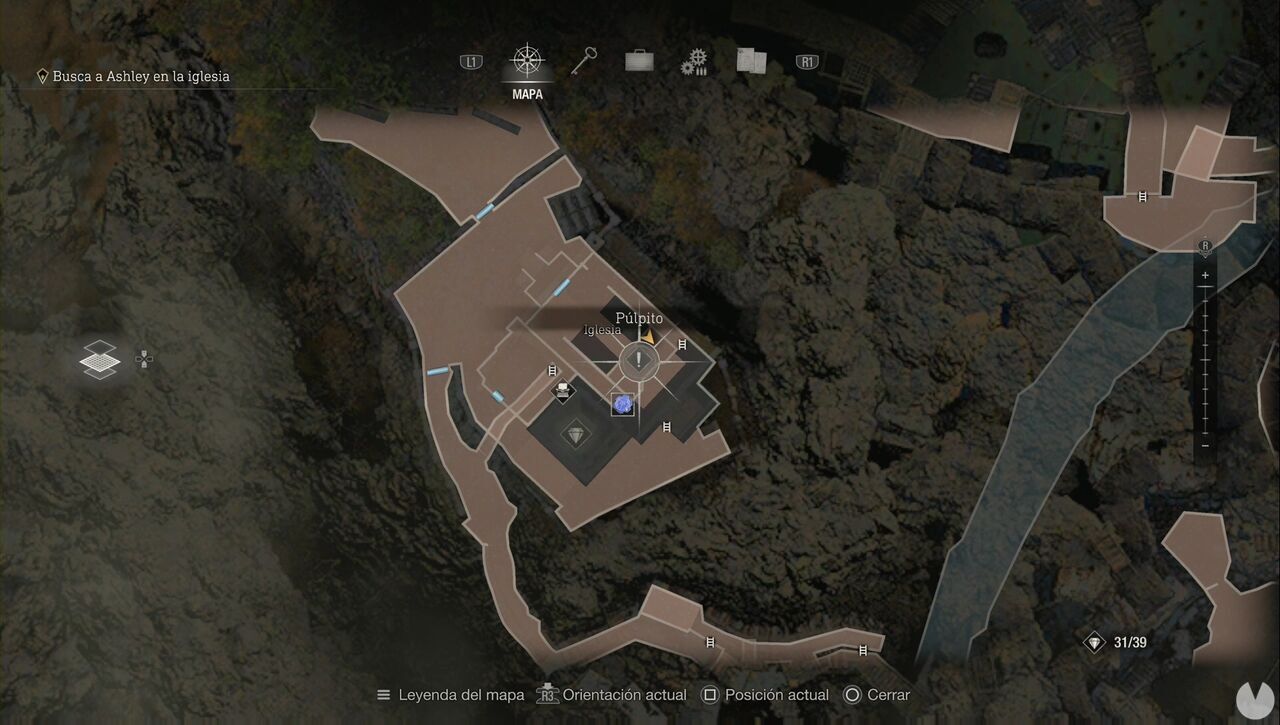
Now collect the Blue Dial from the southern corner of the ground floor and place it in the pulpit. Since this puzzle requires precise rotation, we can't provide an exact sequence of movements. You'll need to rotate the pieces until they form the symbol of Los Iluminados. The only tip we can give you is to focus on the center while rotating them: each color fits along one edge of the symbol, making the puzzle easier to solve.
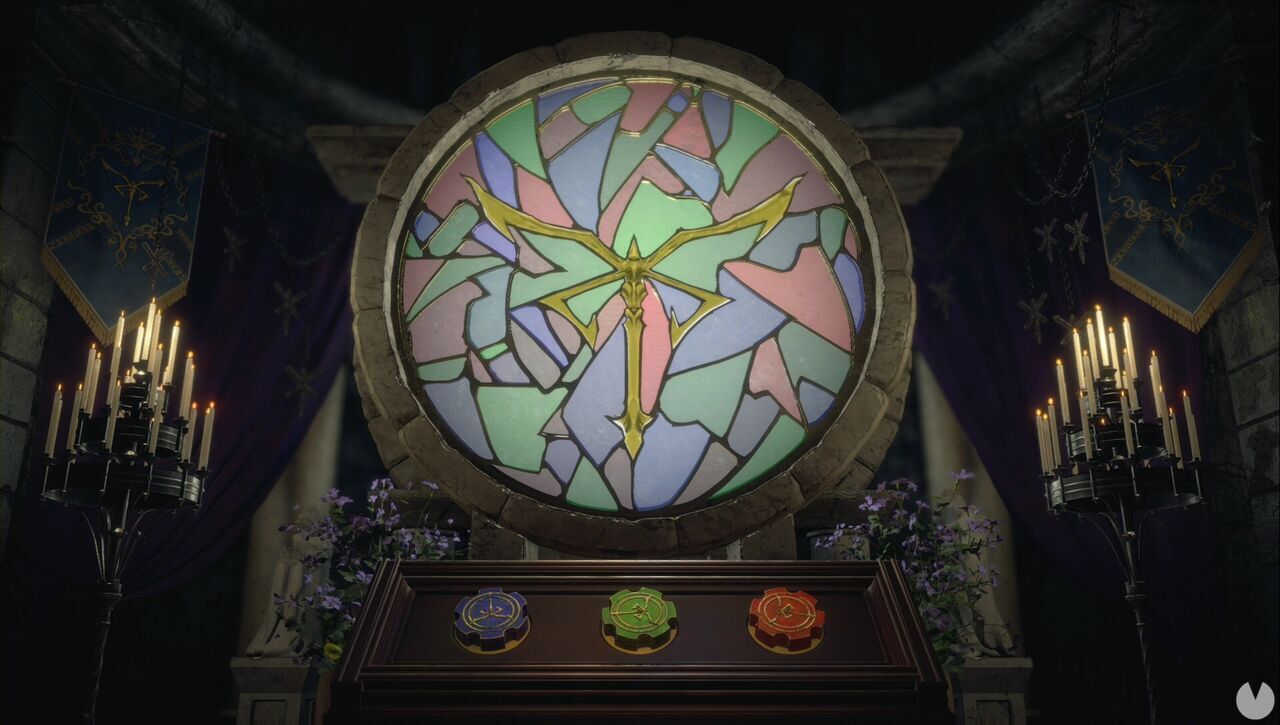
This will allow you to reach the upper floor and continue with the story.
You'll encounter the Treasury puzzle during Chapter 7, and you'll need to solve it to move forward.
) Resident Evil 4 Remake, you'll have to solve a large number of puzzles and brainteasers. Most are mandatory, although a couple of them are optional. To make sure you don't run into any trouble, this section provides all the solutions and explains what you need to do to find them. Bear in mind that some puzzles have different solutions depending on the difficulty level. This guide covers every solution and explanation you'll need to solve the puzzles found while exploring each of the game's areas.
Resident Evil 4 Remake, you'll have to solve a large number of puzzles and brainteasers. Most are mandatory, although a couple of them are optional. To make sure you don't run into any trouble, this section provides all the solutions and explains what you need to do to find them. Bear in mind that some puzzles have different solutions depending on the difficulty level. This guide covers every solution and explanation you'll need to solve the puzzles found while exploring each of the game's areas.
This puzzle takes place in Chapter 2, at the Abandoned Factory, after obtaining the Hexagonal Emblem in the Valley. You'll need to use this key item on the Hexagonal Slot to continue.
To solve the puzzle and move forward, you need to make the eagle facing you look like a mirror image of the one on the door. In other words, the tips of its wings should point upward and its beak should face right.
Now simply flip it horizontally so that it fits into the slot and opens the door. This will allow you to continue the story.
You'll come across this puzzle during Chapter 2, inside the Village Chief's Manor. It's a cupboard in the southeastern corner of the ground floor.
You'll find the solution in the book in the upstairs hallway. To solve the puzzle, turn the dials until they display the wheat, pig and baby symbols, then press the confirm button. The solution is the same on Hardcore and Professional.
Once the cupboard opens, you can collect the Crystal Marble, which is used in the next puzzle.
This puzzle appears in Chapter 2, immediately after the previous one, upstairs in the Village Chief's Manor. You need to use the Crystal Marble on the Door with Round Slot.
Your goal is to turn and rotate the marble until you form the village symbol. You can see the solution below. Since the game remembers the position in which you left the marble, we can't provide exact instructions, as the solution will depend on how much you moved it from its starting position.
The door will open, allowing you to examine the room.
This puzzle appears during Chapter 4, in the Large Cave Shrine area.
To solve it, press the buttons matching the symbols painted around the cave:
You'll obtain one of the heads needed for the Lake altar.
This puzzle is identical to the previous one, and you'll find it in the northeastern corner of the Lake.
As before, you need to look for the solution among the markings painted around the cave:
You'll obtain one of the heads needed for the Lake altar.
This optional puzzle can be found on the southwestern shore of the Lake.
The first thing you need to do is find the three Hexagon Pieces:
[slideshow:1679520796](slideshow:1679520796)
Once you have them, return to the pedestal, insert the pieces and look at the following image:
You'll notice that the tiles can only be moved in groups of three: the top group (1), the bottom-left group (2) and the bottom-right group (3). You should only need to move groups 2 and 1 to complete the puzzle and obtain the Depraved Idol treasure.
You'll need to solve this puzzle during Chapter 4. The first thing you need to do is pull the lever beside the altar to activate the puzzle.
Now pick up the Blue Dial from the southern corner of the ground floor and place it in the pulpit. Since this is a puzzle that requires precise rotation, we can't give you exact instructions. You'll need to keep turning the dials until you form the Illuminados symbol. The only advice we can give you is to focus on the center while turning them: each color fits along one edge of the symbol, making the process easier.
This will allow you to reach the upper floor and continue the story.
You'll find the Treasury puzzle during Chapter 7, and you must solve it to continue.
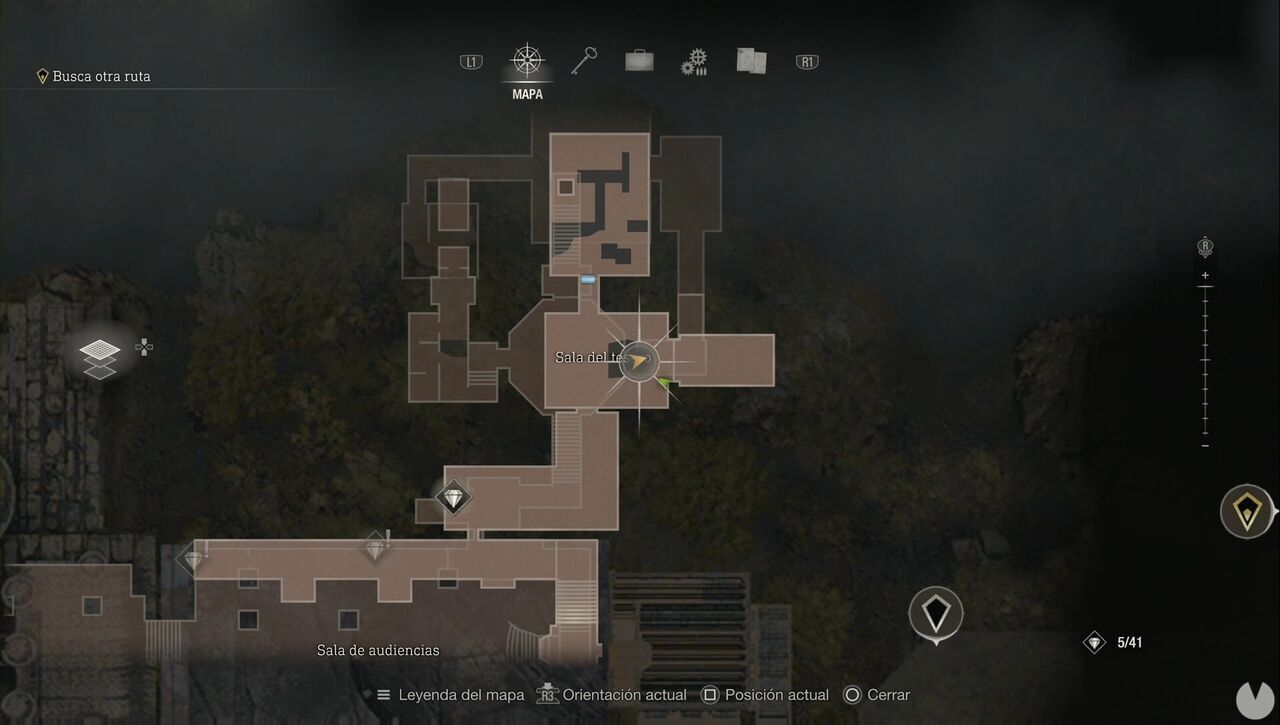
The puzzle is split into two parts. For the first one, look at the gate to the east. You'll see three symbols on the door.
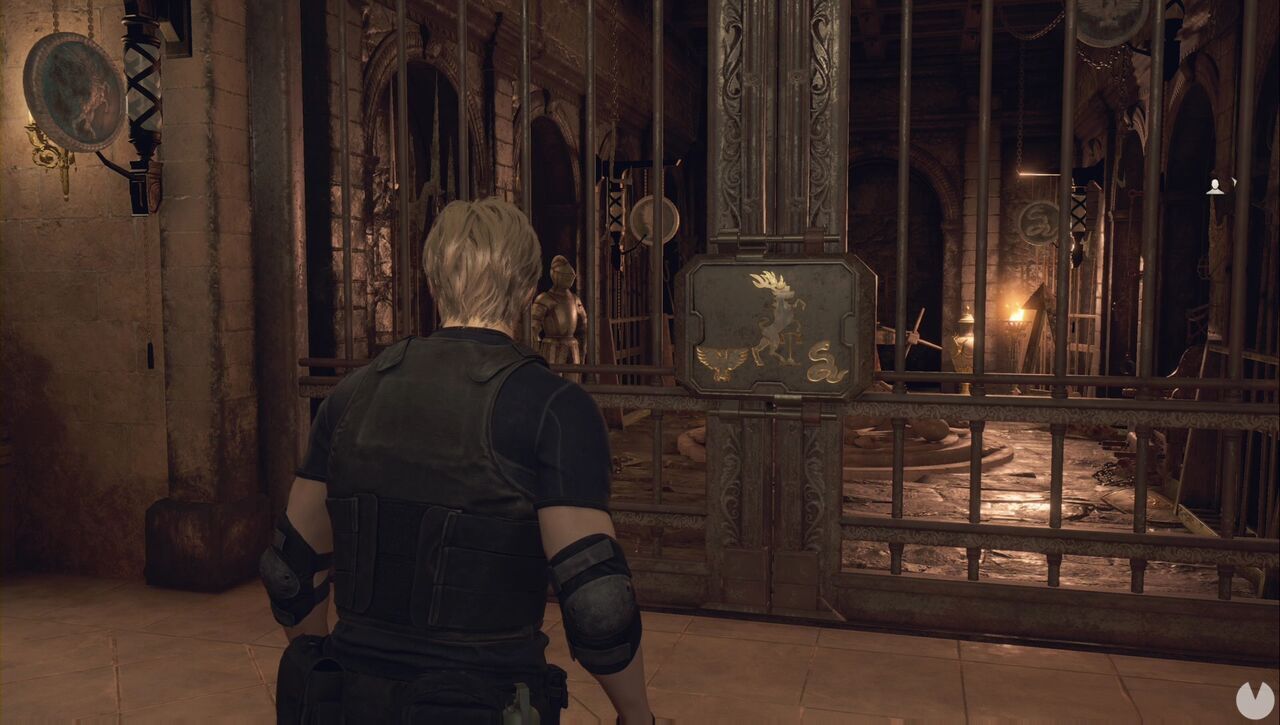
You need to pull the ropes attached to the gongs or shoot them when they are out of reach, targeting the ones that match the symbols on the doors. Once the door opens, you can collect the Bloodied Sword, which is used in the second part of the puzzle. On the southern wall, collect the three swords from the wall reliefs: the Golden Sword, Iron Sword and Rusted Sword. You must now place all four swords in the correct order. From left to right, the order is Iron, Golden, Bloodied and Rusted.
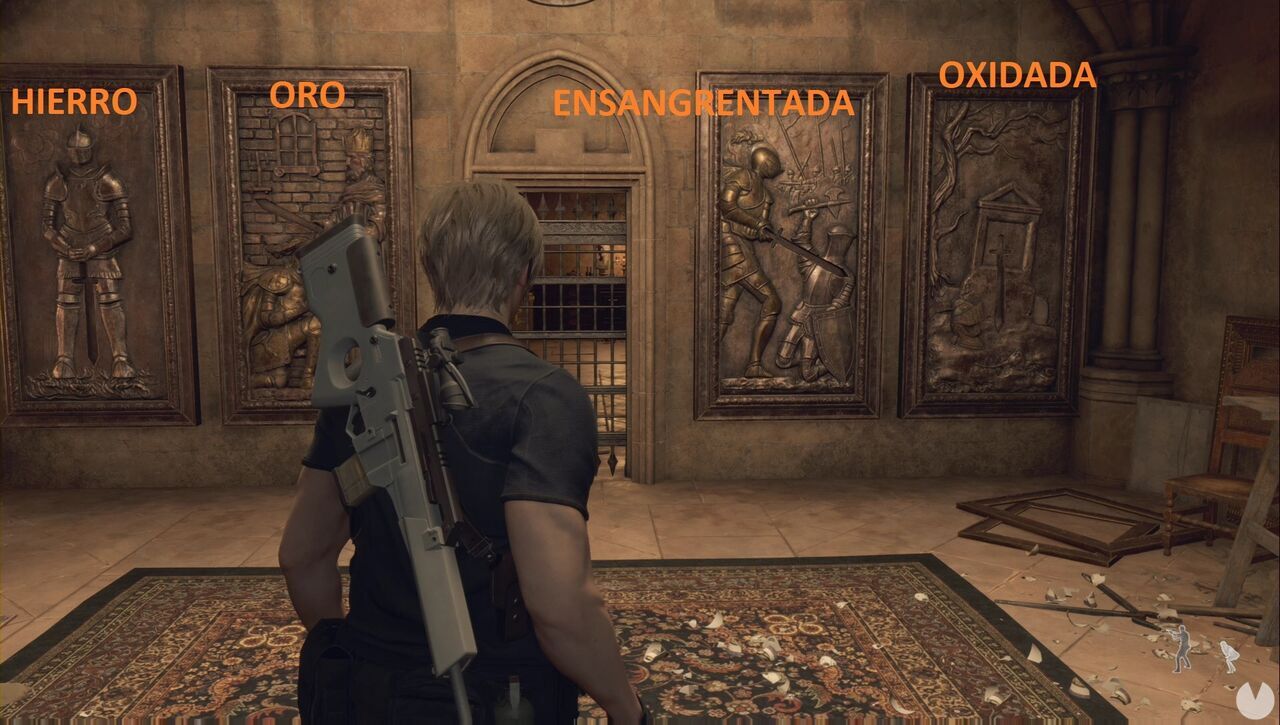
This will open the door and allow you to continue. The solution is the same on Hardcore and Professional.
This puzzle appears immediately after the previous one, also during Chapter 7.
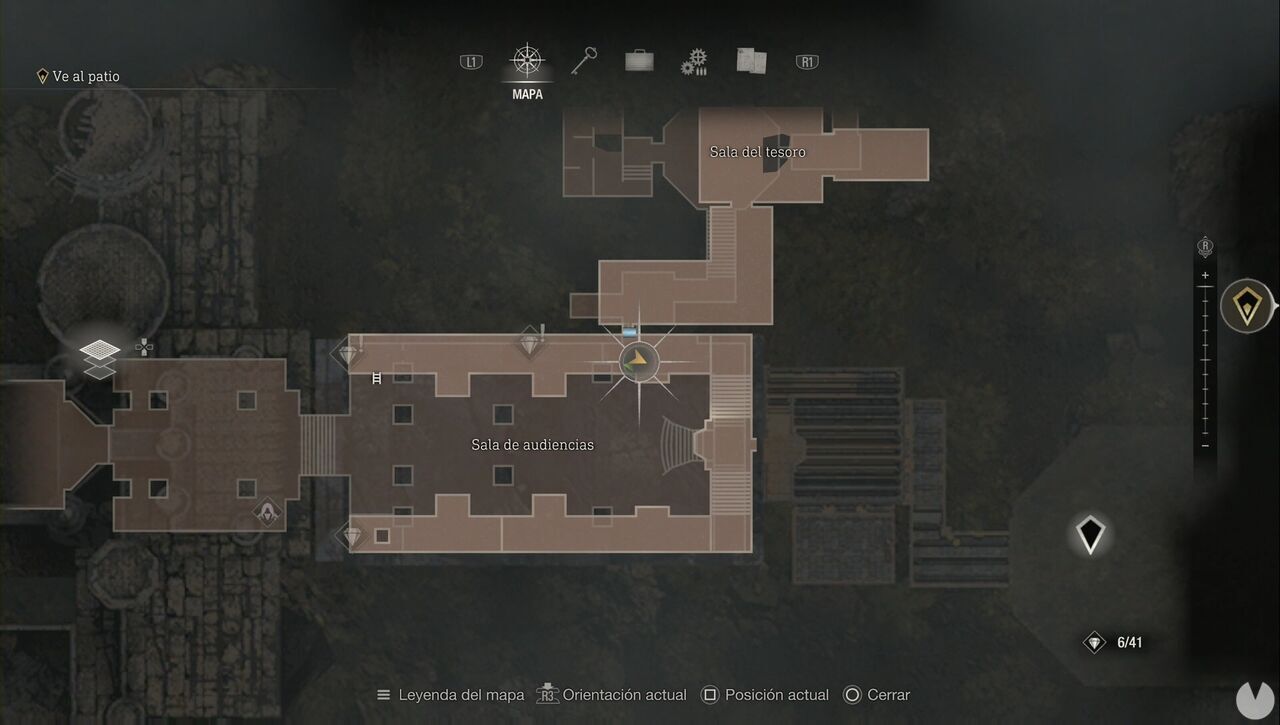
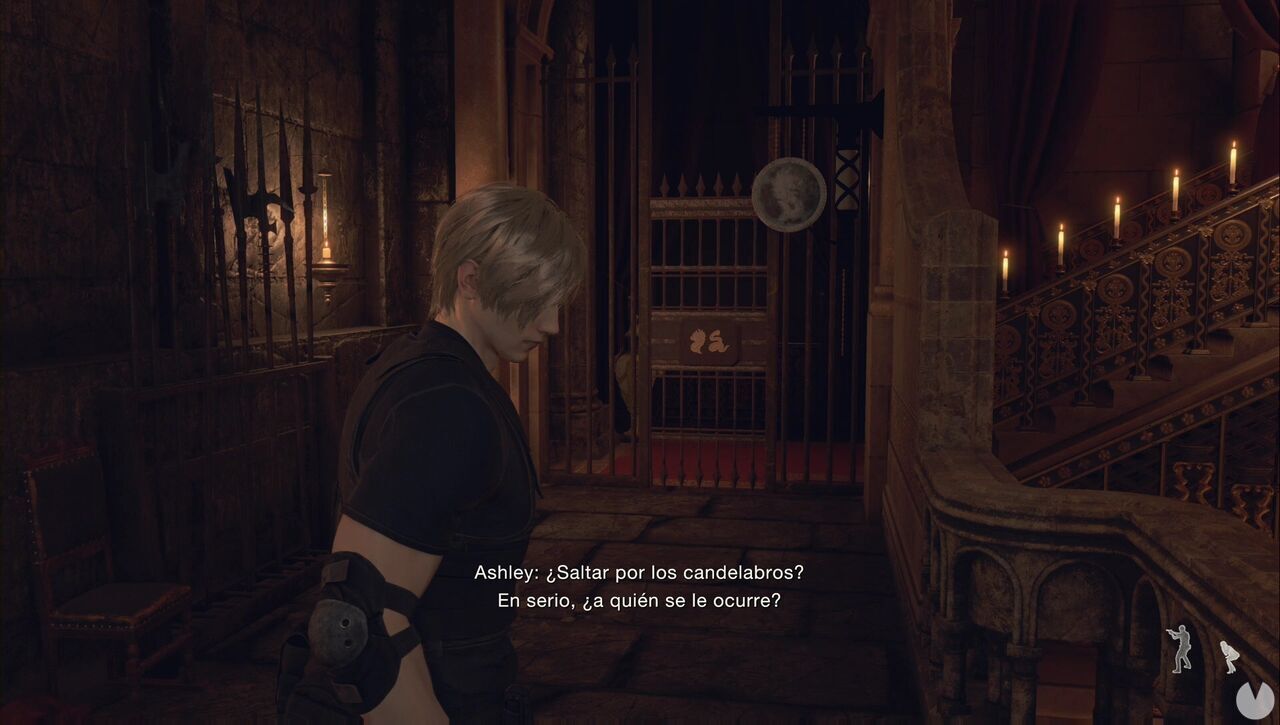
Once again, you'll see a gate, this time displaying two symbols. They should be the fish and the snake. There's a gong beside each gate—jump across the chandeliers to reach the other side—and you only need to pull both ropes to open the main door and continue. On Hardcore and Professional, the gongs are in different locations: one is in the northeastern corner, while the other is on the western side of the central section of the southern balcony.
You'll find this puzzle during Chapter 8, and you must solve it to continue. You'll come across it when you reach the Bindery.
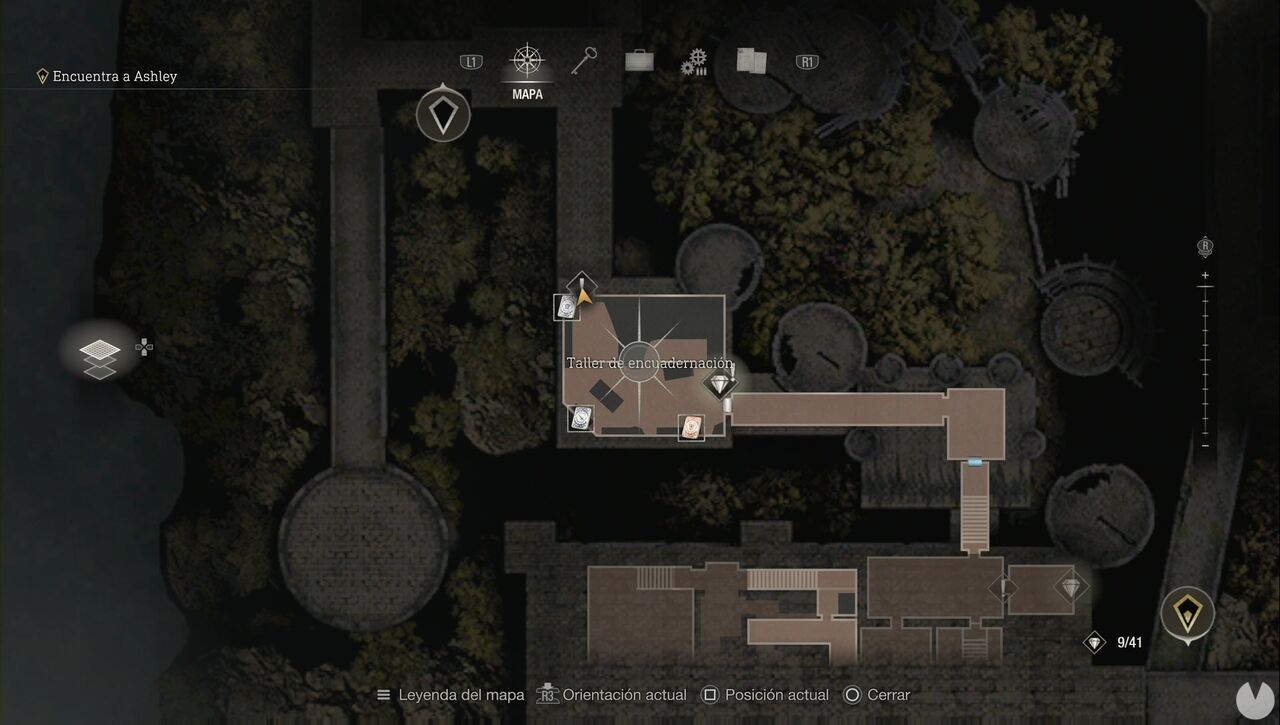
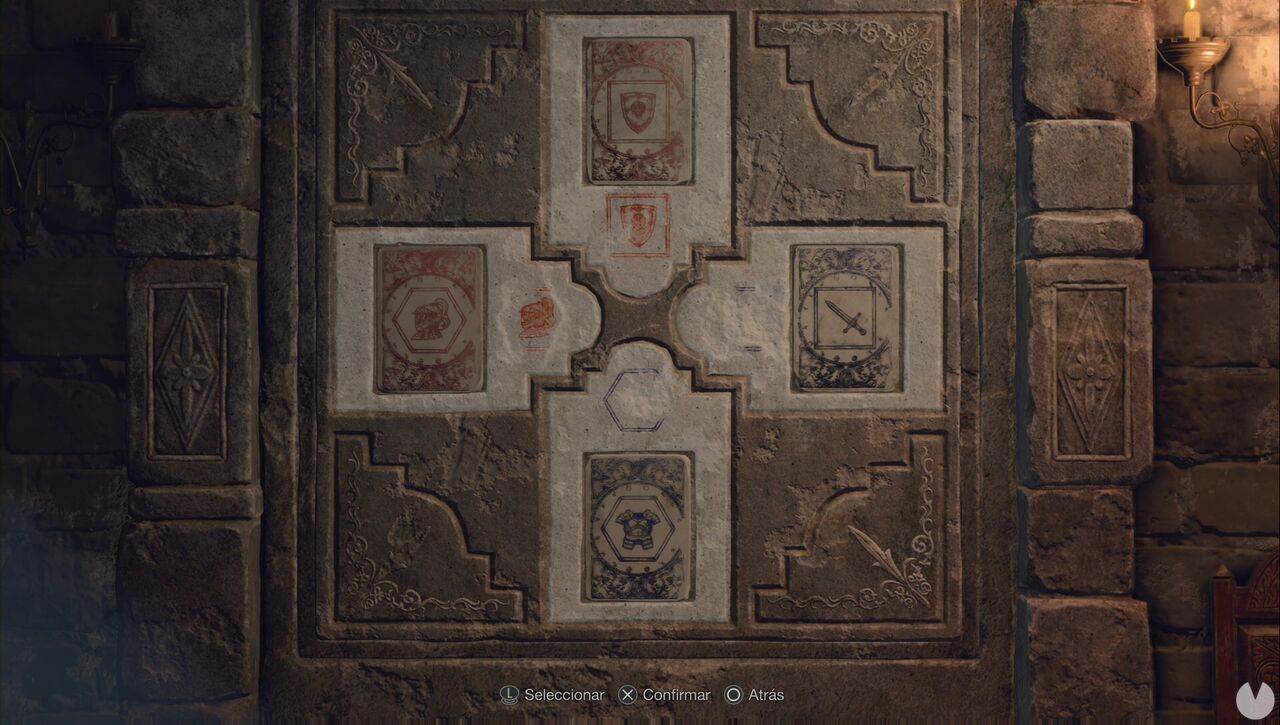
The first thing you need to do is collect the three Lithographic Stones from the corners of the room, then interact with the northwestern door. You can swap and rotate the stones to change their image, border and color. The solution is as follows:
You'll find the Grandfather Clock puzzle during Chapter 9. It can appear at two different points depending on how you progress through Ashley's section, but you can't miss it. All you need to do is set the time to 11:04. On Hardcore and Professional, the correct time is 7:00.
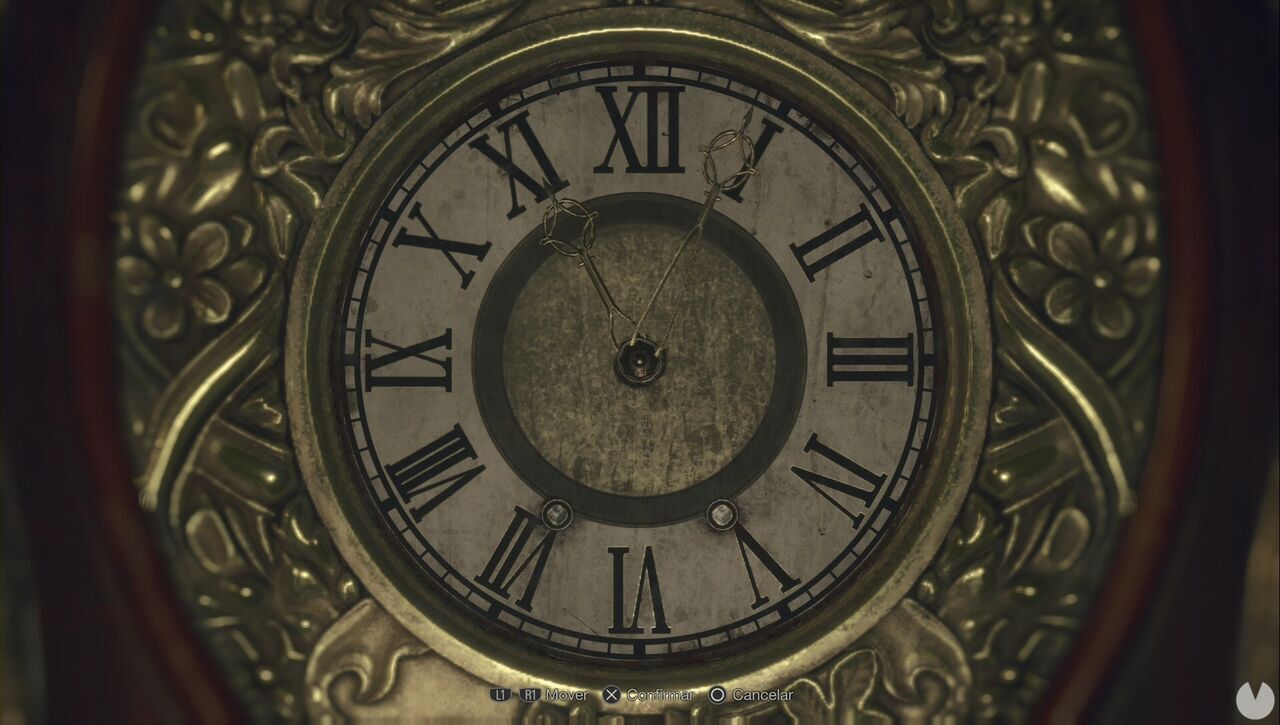
Bear in mind that you may need to complete the puzzle twice, but the answer will be the same both times. The solution can be found in a note in the upper section of the Library, which you can reach by using one of the keys on the elevator door on the ground floor.
You'll find this puzzle during Chapter 9, after taking the elevator down to the Mausoleum. As with the other gong puzzles, you need to look at the door to see which symbols must be activated to open it.
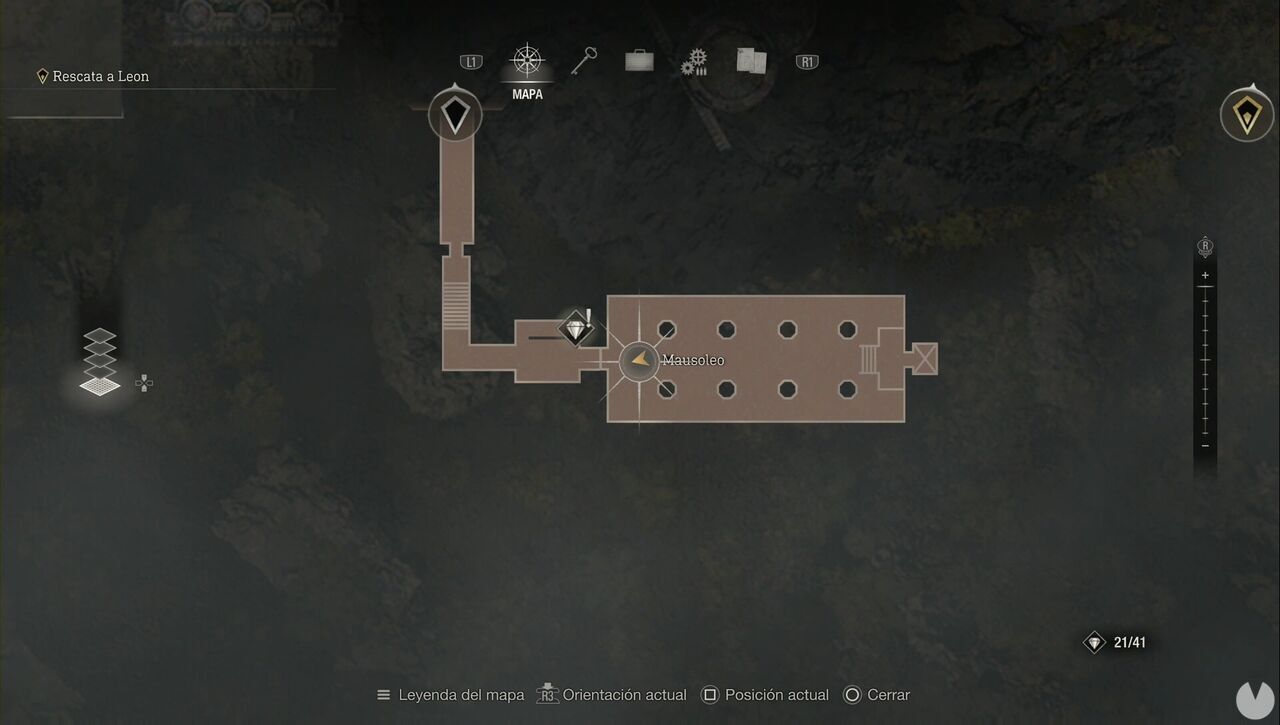
In this case, you need to activate every gong, with two located on each wall. You'll have to run around and activate all of them. Once you've done so, you'll be able to continue. The solution is the same on Hardcore and Professional.
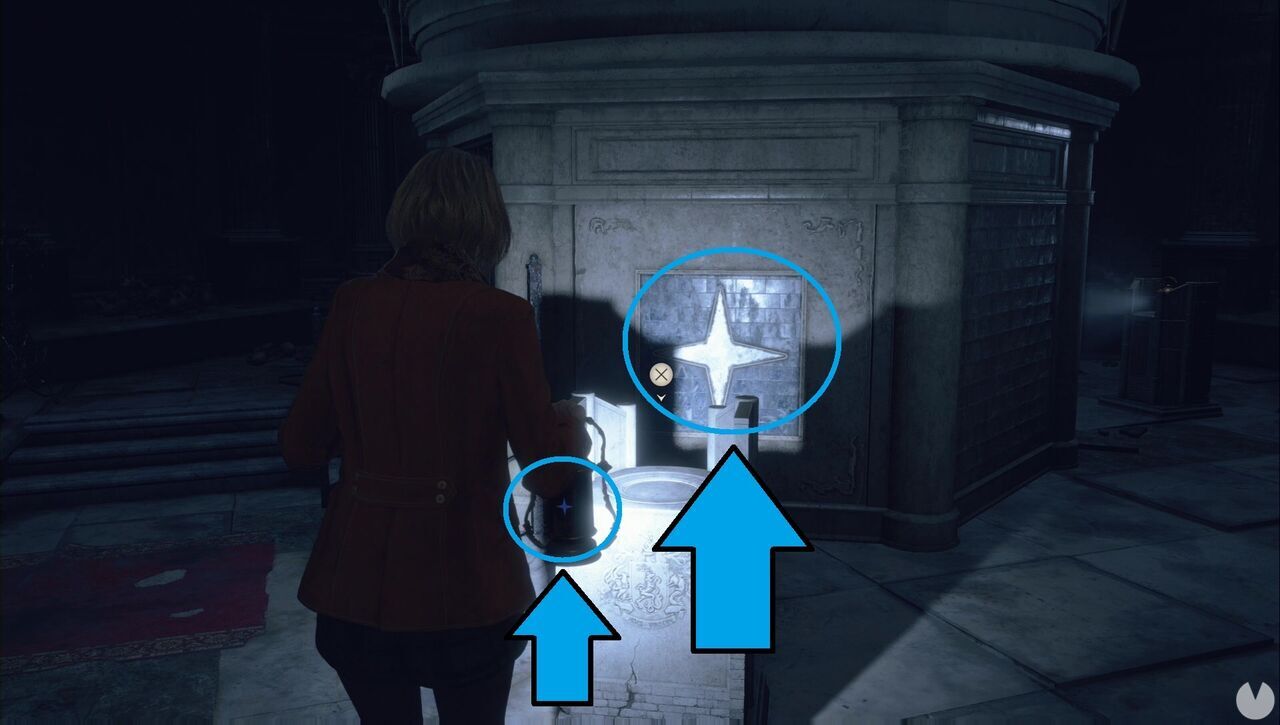
You'll find this puzzle during Chapter 9, right at the end of the Mausoleum.
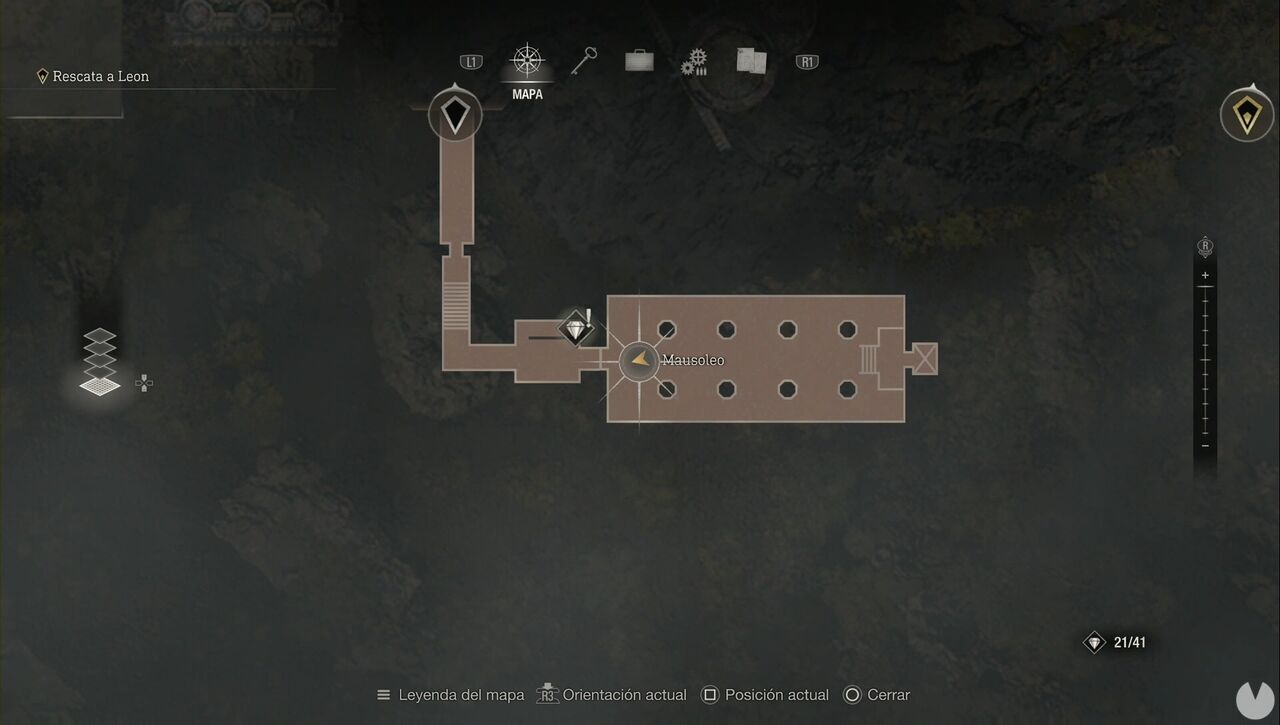
In this puzzle, you need to match the lantern's gem to the symbol on the wall in front of it. The solution is the same on Hardcore and Professional.
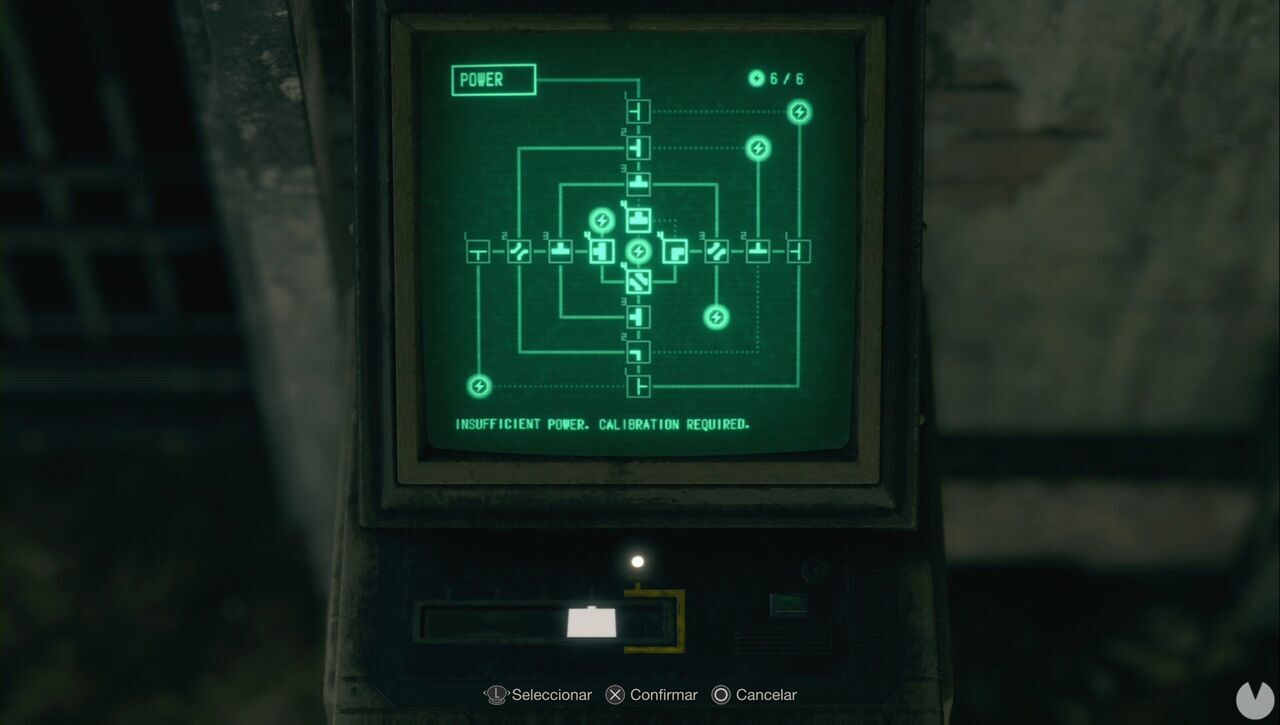
You'll find several of these puzzles during the final stretch of the game. The first is in the Dissection area during Chapter 13. In all of these puzzles, the goal is to create a line from the Power icon to every lightning-bolt icon by rotating each section and then pressing the central button. The first solution is shown below.
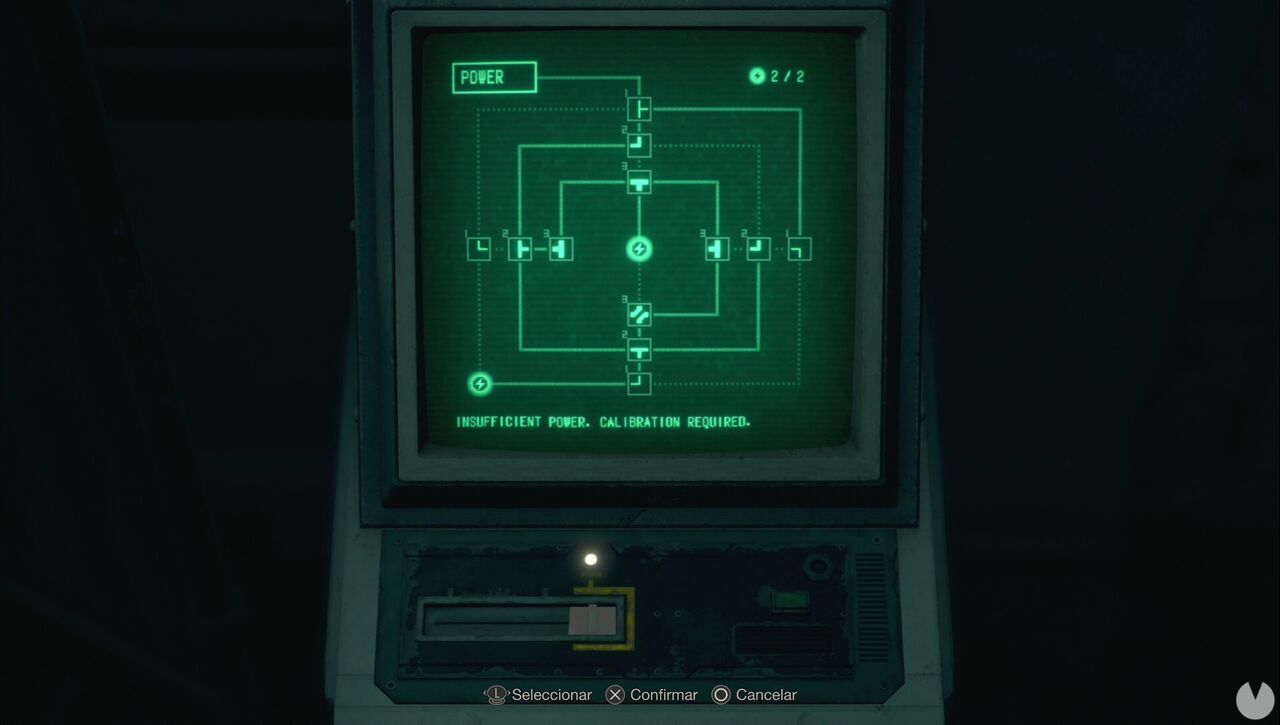
The solution on Hardcore and Professional is as follows:
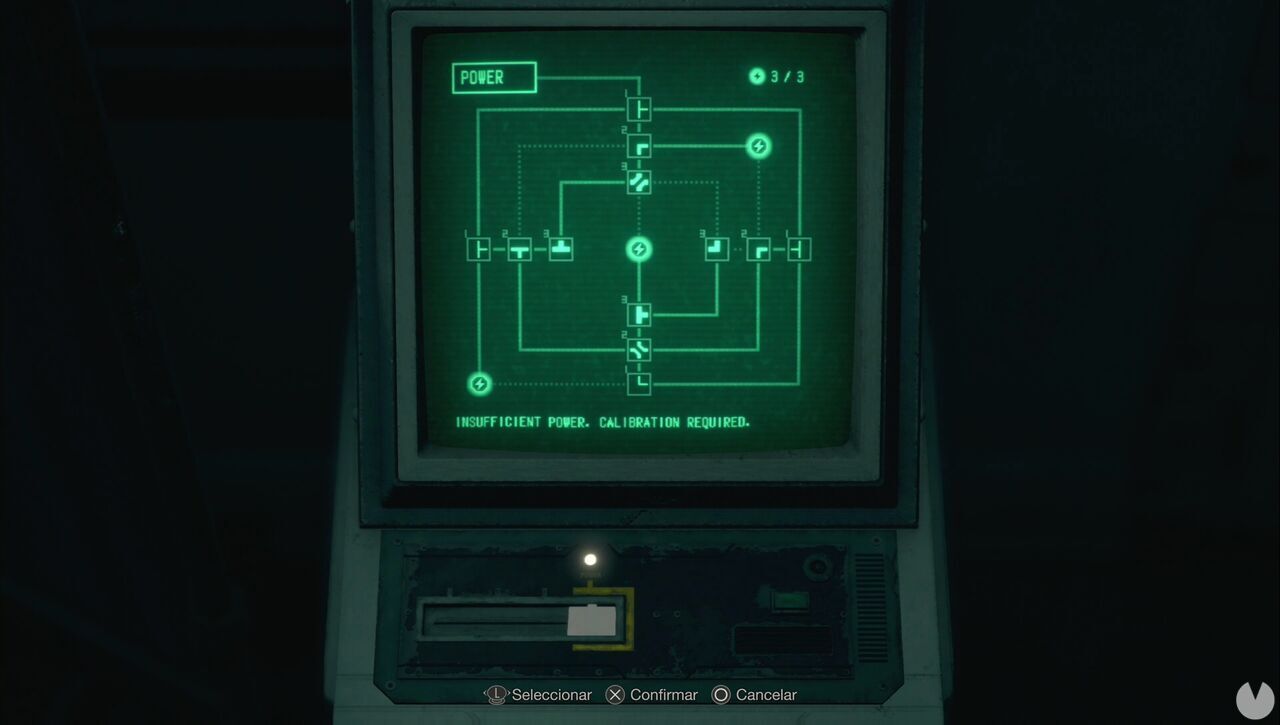
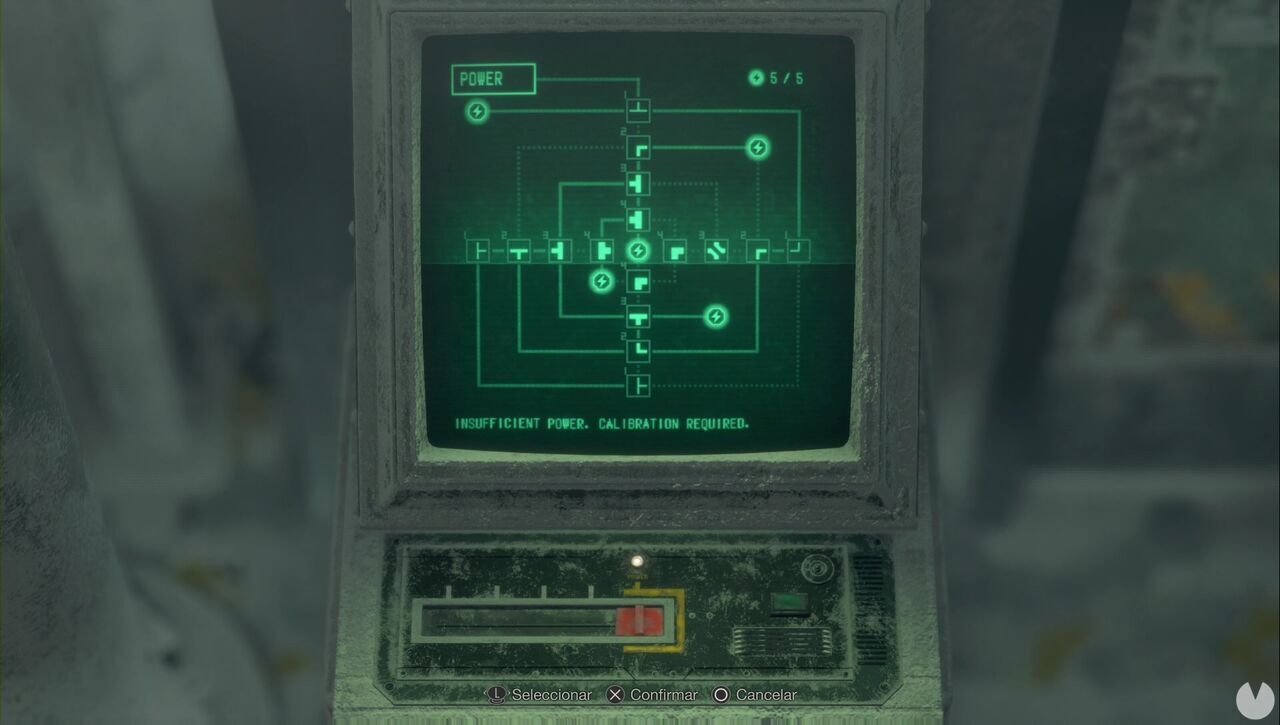
This optional puzzle is in the Freezer area, where you upgrade the keycard, during Chapter 13. It's solved in the same way as the previous one, and you can see the solution below. The LE 5 can be found inside the Freezer.
The third console puzzle is mandatory and takes place during Chapter 14, when you reach the Waste Disposal area containing the sewer. You can see the solution below.
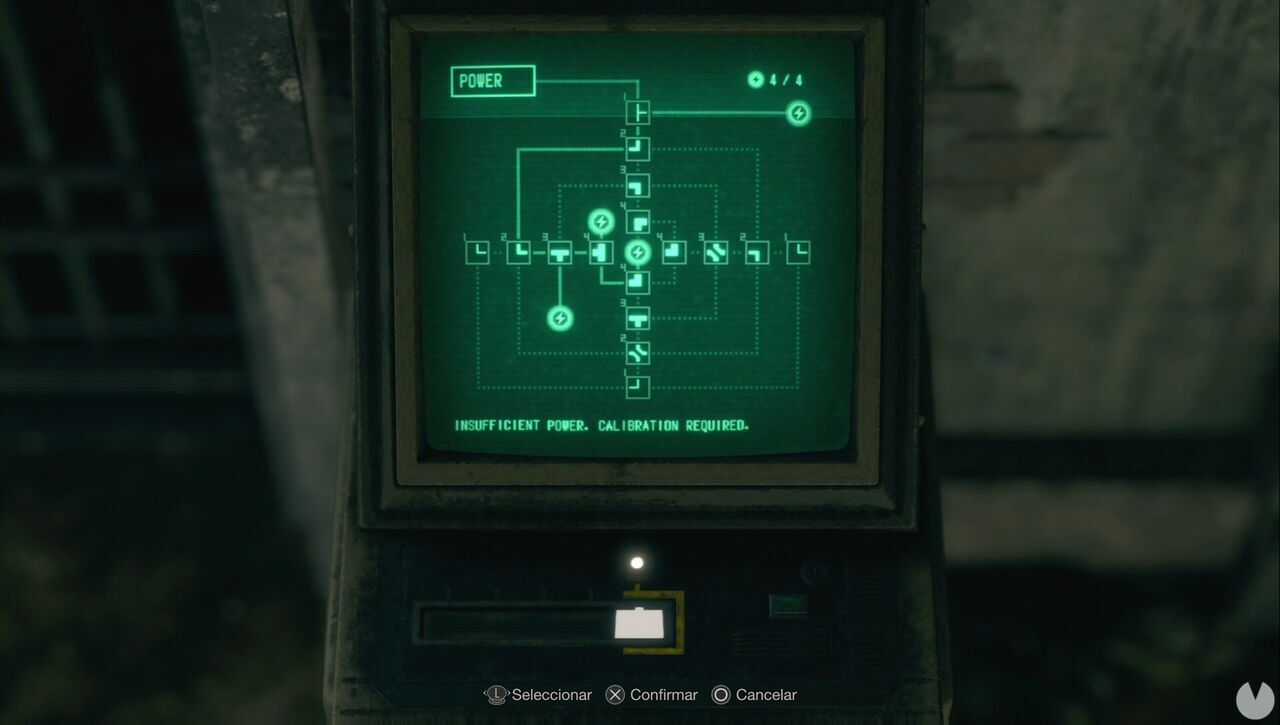
The solution is different on Hardcore and Professional: