Nemesis in Resident Evil 3 Remake: How to Beat Him, Rewards and Encounters
Nemesis in Resident Evil 3 Remake: How to Beat Him, Rewards and Encounters
We show you how to defeat Nemesis in every Resident Evil 3 Remake encounter and what rewards he’ll drop when you succeed.
César Rebolledo · Published: 19 Jul 2026, 23:44
Resident Evil 3 Remake introduces Nemesis, the B.O.W. created by Umbrella’s European branch, as its main antagonist. He is the result of infecting a Tyrant with a parasite, allowing the creature to be "programmed" to follow simple orders. In this case, his orders are clear: eliminateel the members of S.T.A.R.S., making Jill his main target and top-priority prey in Raccoon City.
Throughout the game, you’ll face the monster in both optional and mandatory encounters. Just like in the original game, taking him down during the optional encounters will earn you weapon upgrades and other useful resources. To help you deal with him, we’ve divided everything you need to know into three sections.
How to temporarily take down Nemesis or escape from him
During his optional appearances, Nemesis cannot be killed, but taking him down is fairly easy. Simply shoot the device on his chest whenever you get the chance until he falls to the ground. You’ll generally need to knock him down twice to fully incapacitate him. It will take him quite a while to get back up. There’s not much to worry about, as you should be able to dodge most of his attacks fairly easily.
Try to use objects in the environment to damage him, especially red barrels, although sparking generators can also stun him for a few seconds. Finally, a single Hand Grenade will knock him down immediately.
Rewards for defeating Nemesis in optional encounters
Below are the Nemesis encounters where defeating him is optional. If you manage to bring him to his knees, however, he’ll drop a Supply Case containing a weapon upgrade. Bear in mind that if he appears between the specific points mentioned below, he won’t drop anything. For example, he will appear again between the first encounter—after restoring power—and the second—after setting the subway route—but he won’t drop a reward.
After restoring power
Immediately after restoring power in Downtown, Nemesis will appear outside the power substation as you make your way back to Kite Bros. Railway. Take him down to obtain the Extended Magazine (Handgun) for the G19.
After setting the subway route
Immediately after solving the subway route puzzle in Downtown, you’ll see Nemesis infect a zombie when you leave the Donut Shop. Take him down to obtain the Moderator (Handgun) for the G19.
While escaping from him in the subway
At the end of the Downtown section, just before starting the Sewers and Construction Site section, you’ll have to escape from Nemesis through a corridor and a warehouse. You can take him down here, but if you wait until you reach the warehouse, you can use the red barrels to bring him to his knees. He will only drop Shotgun Shells.
While escaping from him through the streets
You’ll have to escape from Nemesis after the rooftop battle. Once he appears outside the Donut Shop, you can take him down again. The Supply Case will contain Flame Rounds.
How to kill Nemesis in the mandatory boss fights
These are the mandatory battles against Nemesis. You’ll have to defeat him to continue, so we’ll explain how to’ll explain handle each encounter. Obviously, ,this does not include the sections where you simply have to run away from him from.
On the rooftop
Around the corners of the rooftop and on top of the pallets, you’ll find two Green Herbs, one Red Herb, Shotgun Shells, Handgun Ammo and Explosive Rounds. As a general rule, you’ll need nine Explosive Rounds if you don’t miss any shots. Bring some Hand Grenades as backup. The battle is divided into three phases:
Phase 1: Nemesis will try to roast you with his flamethrower. He only fires it in a straight line, so simply hide behind the pallets to avoid taking damage. Your goal is to lure him close to the generator beside one of the pallets, shoot it with your handgun and then deal as much damage as possible to the fuel tank on his back.
Phase 2: after dealing enough damage to the fuel tank—two hits from the Grenade Launcher—Nemesis will begin to move a little faster. He may try to hit you with the flamethrower and can also shoot flames into the air, temporarily blocking some routes. The strategy remains the same. He doesn’t use the upward flame attack very often, but keep an eye out for it while waiting for the generator to recharge.
Phase 3: after blowing up the fuel tank—six Grenade Launcher hits in total on Standard difficulty—Nemesis will become much faster and start using the flamethrower as a club. This attack has a wide area of effect, so be careful. If you see him crouch down to build up momentum, he’s about to perform a fast charging attack, although its tracking is poor. Simply keep circling the crates beside the generator until it recharges, then repeat the process while making sure he doesn’t get close enough to hit you. Bear in mind that if you try to fire a grenade at him head-on, he’ll dodge it unless he has been electrocuted. Once the fuel tank has exploded, you’ll need to land three direct hits with Explosive Rounds to bring him down.
In Clock Tower Plaza
Start by collecting the items scattered around the area. You should find two Green Herbs and plenty of Handgun Ammo, Shotgun Shells and Grenade Launcher rounds. Bear in mind that if you make Nemesis hit the vehicles, he’ll break their doors open and reveal additional ammunition. With that out of the way, let’s get down to business.
Phase 1: first and foremost, save your Grenade Launcher ammunition. You’ll need it during the second phase of the battle. At first, you can simply keep running. You don’t even need to dodge—just run. Try to make Nemesis hit the police cars and vans, then collect or expose as much ammunition as possible, especially Grenade Launcher rounds. The only attack you’ll need to dodge is his charge. When you see him start running in a noticeably different way—you’ll know it when you see it—wait for the right moment and dodge to one side. It’s also worth noting that you can complete this first phase using the knife by stabbing him after performing perfect dodges.
Phase 2: after taking enough damage and once some time has passed, Nemesis will begin to run around the outer edge of the arena. This is when you should load your Grenade Launcher with Mine Rounds and wait for him to stop: don’t try to fire them into his path. Wait until he stops, then aim and shoot. Mine Rounds travel in a straight line, so there’s no need to account for projectile drop. This will knock him to the ground, allowing you to shoot the device on his chest until he recovers. Repeat the process until the next phase begins, and don’t attack him while he’s on the ground.
Phase 3: after taking a certain amount of damage, Nemesis will slam the ground several times. The battle will then continue in much the same way, except that he now has a new ground-based attack: a low claw combo that can hit you even while you’re running. Stick to the same strategy: don’t attack him while he’s on the ground, and wait for him to climb onto the walls before knocking him down. If you run out of grenades and ammunition, you’re in serious trouble unless you have the knife, can perform perfect dodges on the ground and stab him until he goes down.
Nemesis Stage 2
Phase 1: Nemesis uses the same attacks as he did at the Clock Tower. Keep shooting and stay alive until a cutscene begins.
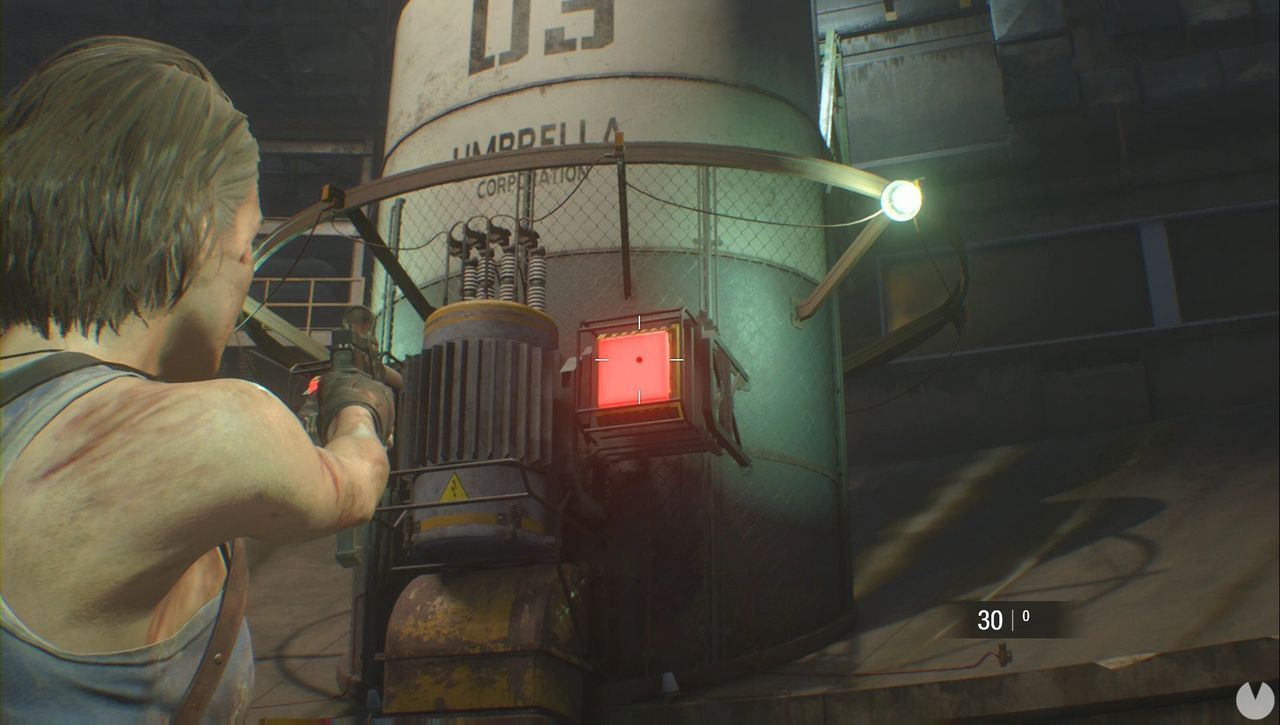
Phase 2: Nemesis will now start running around the outer edge of the arena while zombies appear. Deal with the zombies first. Your partner will tell you which tank Nemesis is hiding behind: use your handgun to shoot the red lights on that tank. This will knock him to the ground, allowing you to target the device on his chest. Just like in the plaza, you’ll need to repeat the process several times: kill the zombies so they don’t get in your way, knock Nemesis down and shoot him in the chest.
Phase 3: after taking enough damage, Nemesis will stop hiding behind the tanks and position himself in front of them instead. Your strategy remains the same: shoot the red lights. You won’t have time to kill the zombies, but Nemesis should take care of them for you. If your partner shouts "Watch out!", stay alert, as the monster will leap directly at you without grabbing onto a tank first. He also gains a new ground-based attack: if you see him raise his tentacle, fire a grenade at him. He is about to unleash a multi-stage attack that is difficult to dodge, so it’s better to interrupt it completely. Keep attacking until he goes down.
Nemesis Stage 3
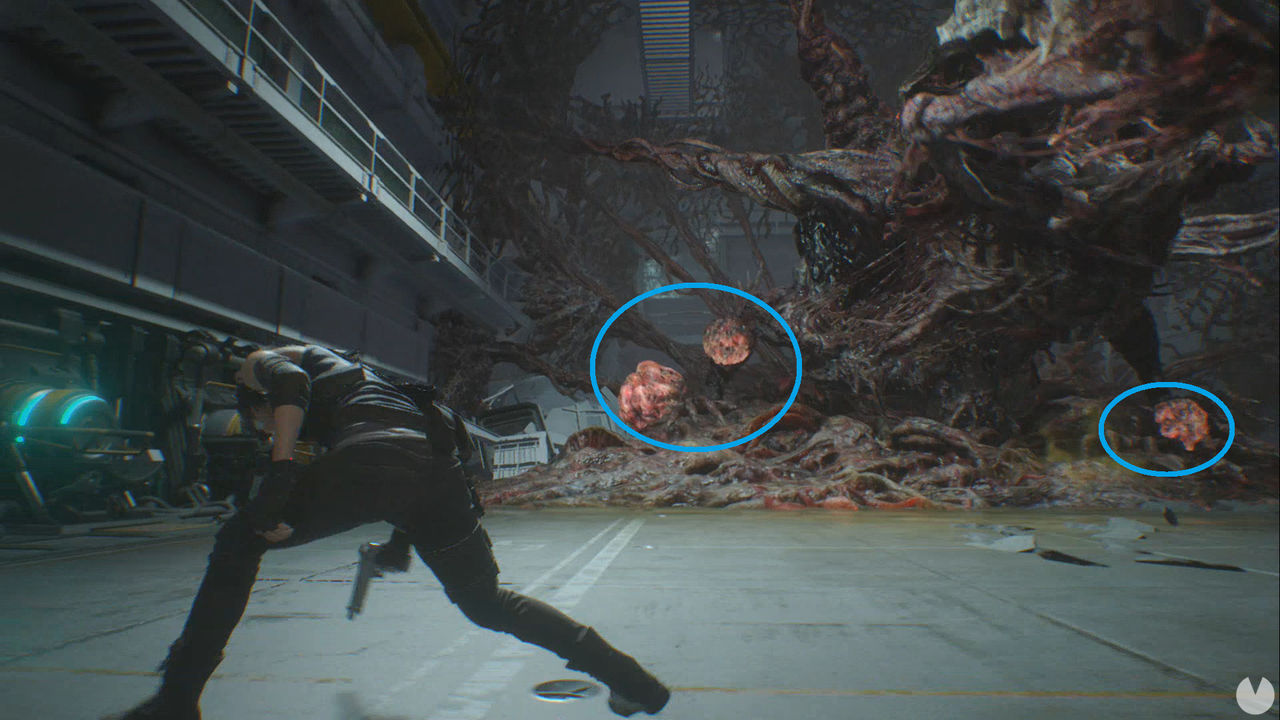
As soon as the fight begins, turn around and pick up the FINGeR to blast Nemesis. This will trigger a cutscene. You then need to push the red power sources back into place, but Nemesis will try to kill you while you do it. To stop his attacks—which can kill you in just two hits on Standard difficulty—you’ll need to destroy the lighter-colored bulbs covering his body. Once you have destroyed all of them, he’ll remain stunned long enough for you to push at least two power sources back into place.
Once the FINGeR has recharged, pull it from its mount again, fire it and follow the on-screen prompts to finish the battle.