
In our guide to Roblox, we have already explained how to make new friends and play games with them. But what if you also want to create a private server to enjoy with your friends?
Roblox allows users to create private servers very easily, in just a few steps and without requiring any programming knowledge. If you have no idea how to do it, we explain everything below.
To create a private server on Roblox, follow these steps:
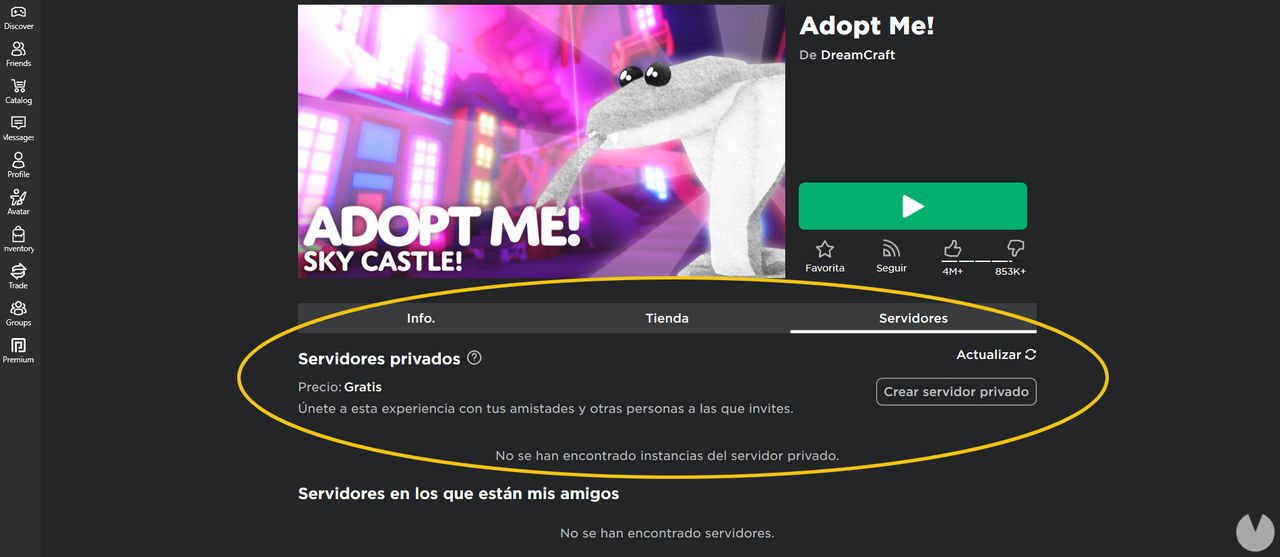
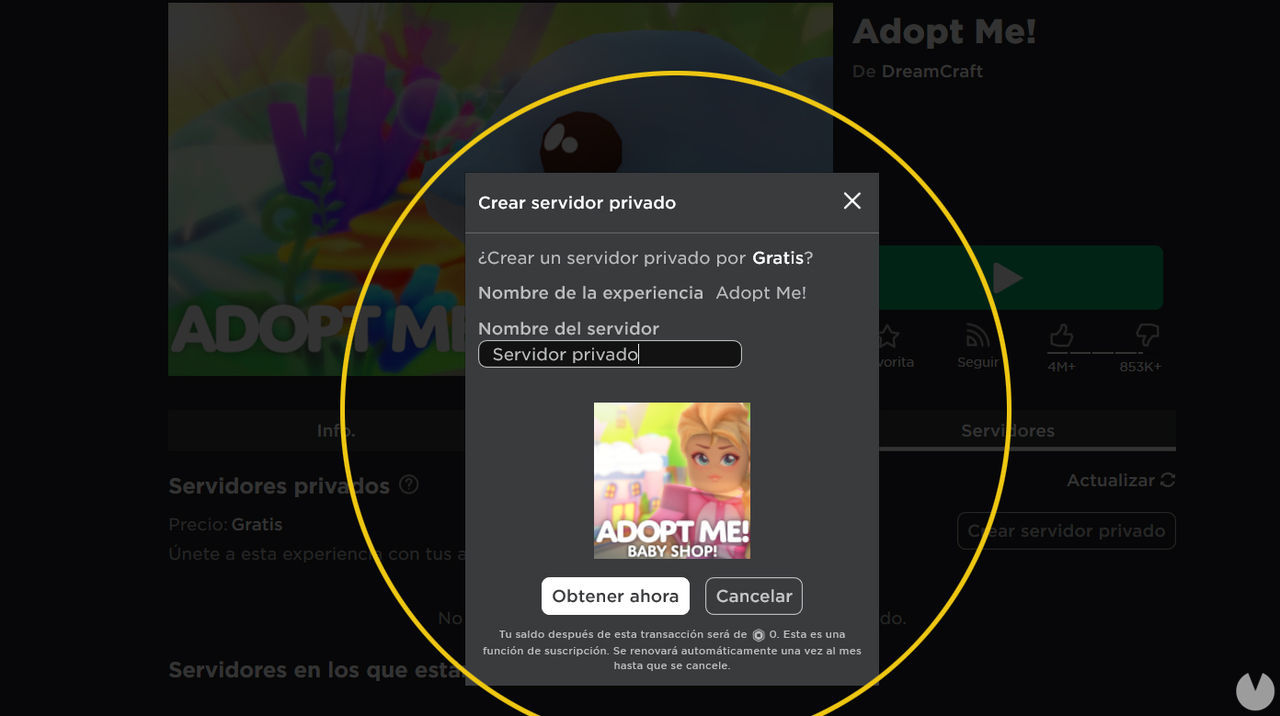
Roblox private servers, formerly also known as VIP servers, can be either free or paid. Some games allow you to create private servers completely free of charge, while others require Robux to create one, depending on whether the game's developer has set a price.
If the price is listed as "Free", you can create the private server at no cost. Remember, however, that there may be a limit on the number of free private servers you can create for each experience.
If you pay to create a private server, bear in mind that you will be charged when you make the purchase and then every month to keep the server active. The monthly renewal fee will automatically be deducted from your Robux balance.

Private server prices are set by each game's developer. They usually cost between 5 and 10 Robux. To cancel your subscription to a paid private server, follow these steps:
This will cancel your paid private server subscription. You will still be able to use it for the remainder of the month you have already paid for, but the subscription will expire at the end of that period and the server will then be deactivated.
In another section of our guide, we have already explained step by step how to get started creating games in Roblox with Roblox Studio. If you have created a game and want to enable private servers for your experience, you will need to follow a few steps.
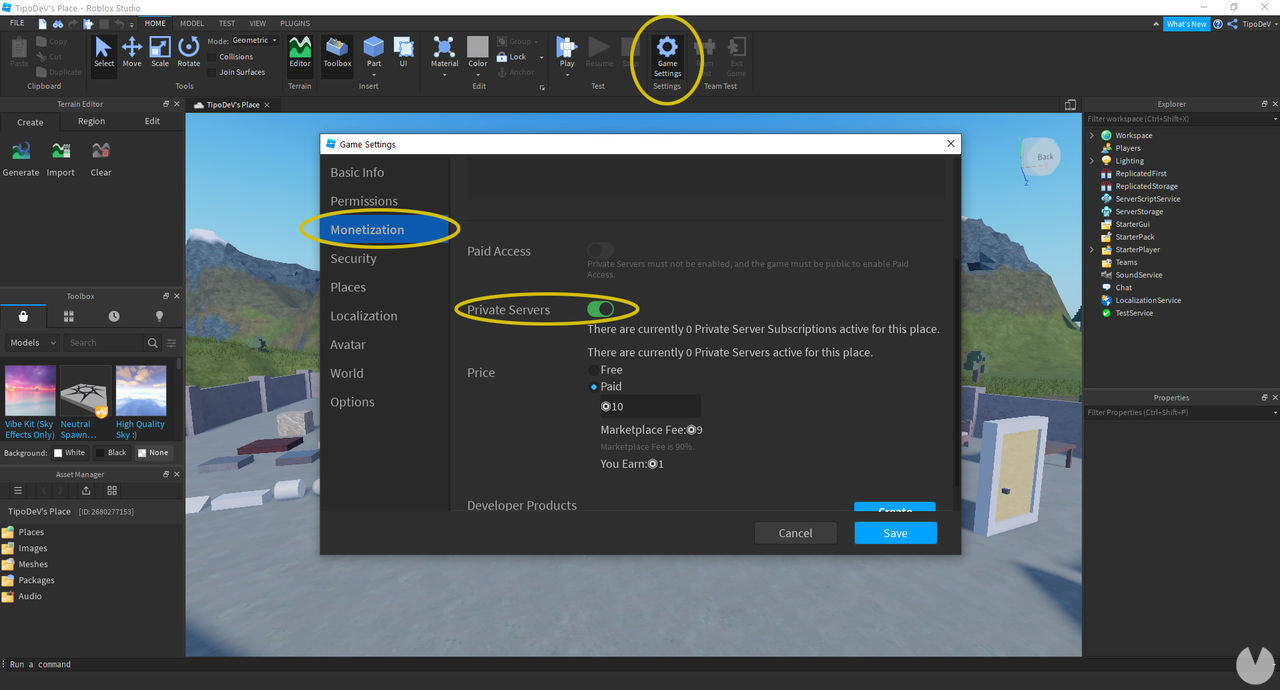
You should now be able to create private servers for the Roblox games you have made, and other users will also be able to create them according to the options you selected. Remember that if you have set a price for your servers and later change that price, all active subscriptions held by other users will be canceled, although they will receive a message in their inbox notifying them of the change.
Immediately after creating a private server on Roblox, you will be given the option to configure its settings. If you skip this step, you can always modify your private server's settings by visiting the game's page, clicking the three-dot button, and then selecting "Configure".
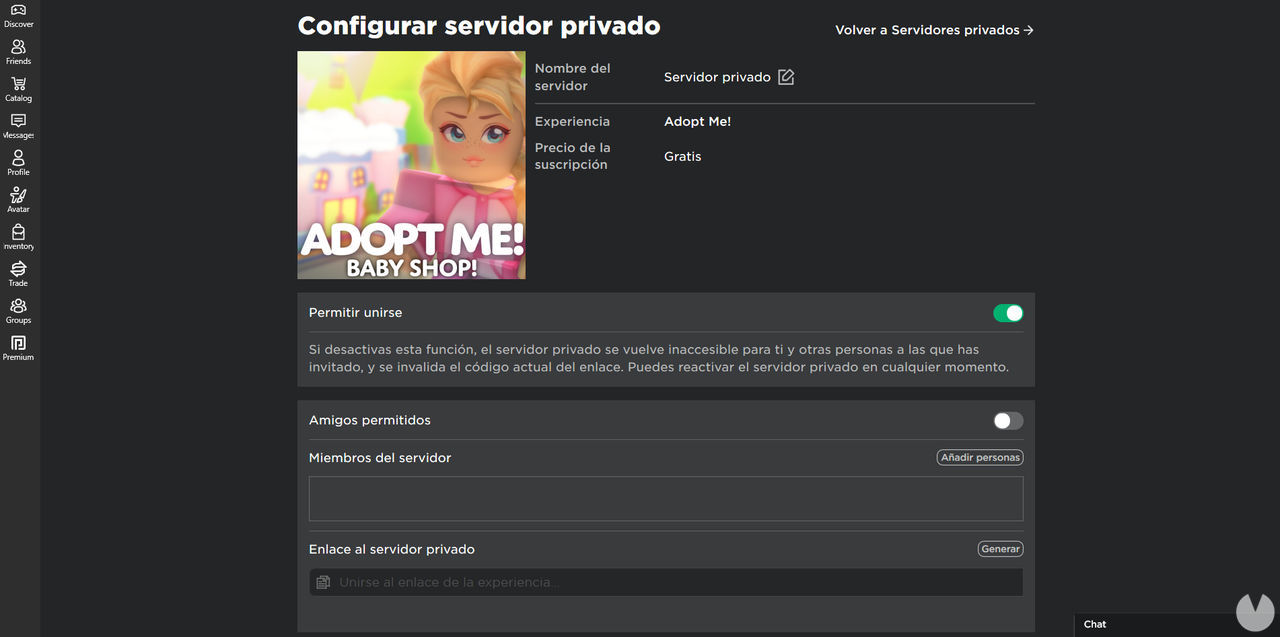
The main server settings allow you to:
There are several ways to invite your friends to a private server. First, you can invite them to join your game just as you would invite them to any regular game. Alternatively, you can add them to the private server's list of permitted friends so they can join on their own.
The final option is to generate a private server link. You can do this from the private server's configuration section, where you will find the option near the bottom of the page.

