
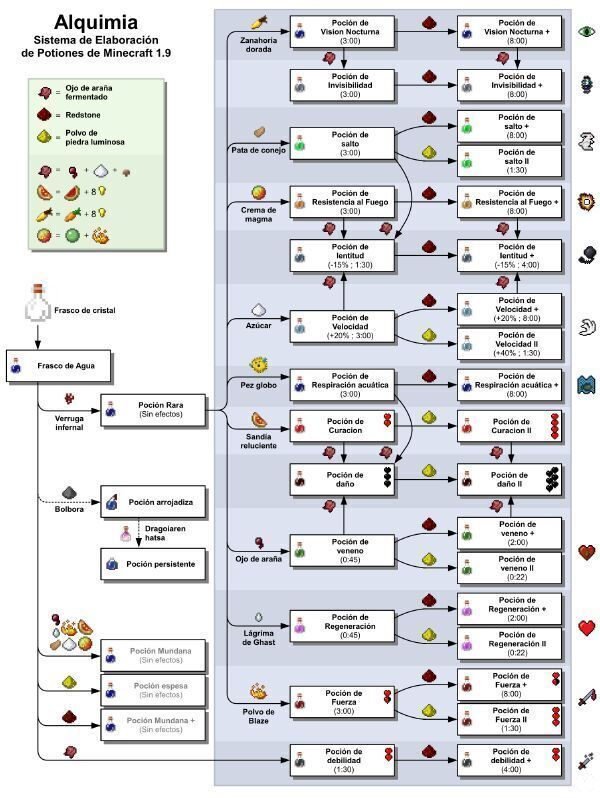
This basic infographic, shared by members of the Minecraft community, can serve as a handy cheat sheet when looking up potions. You'll find much more detailed information further down in our brewing guide.
Below you'll find the complete list of potions and brewing recipes in Minecraft, including the ingredients required to make them and the effects they provide. Potions can be split into three main categories:
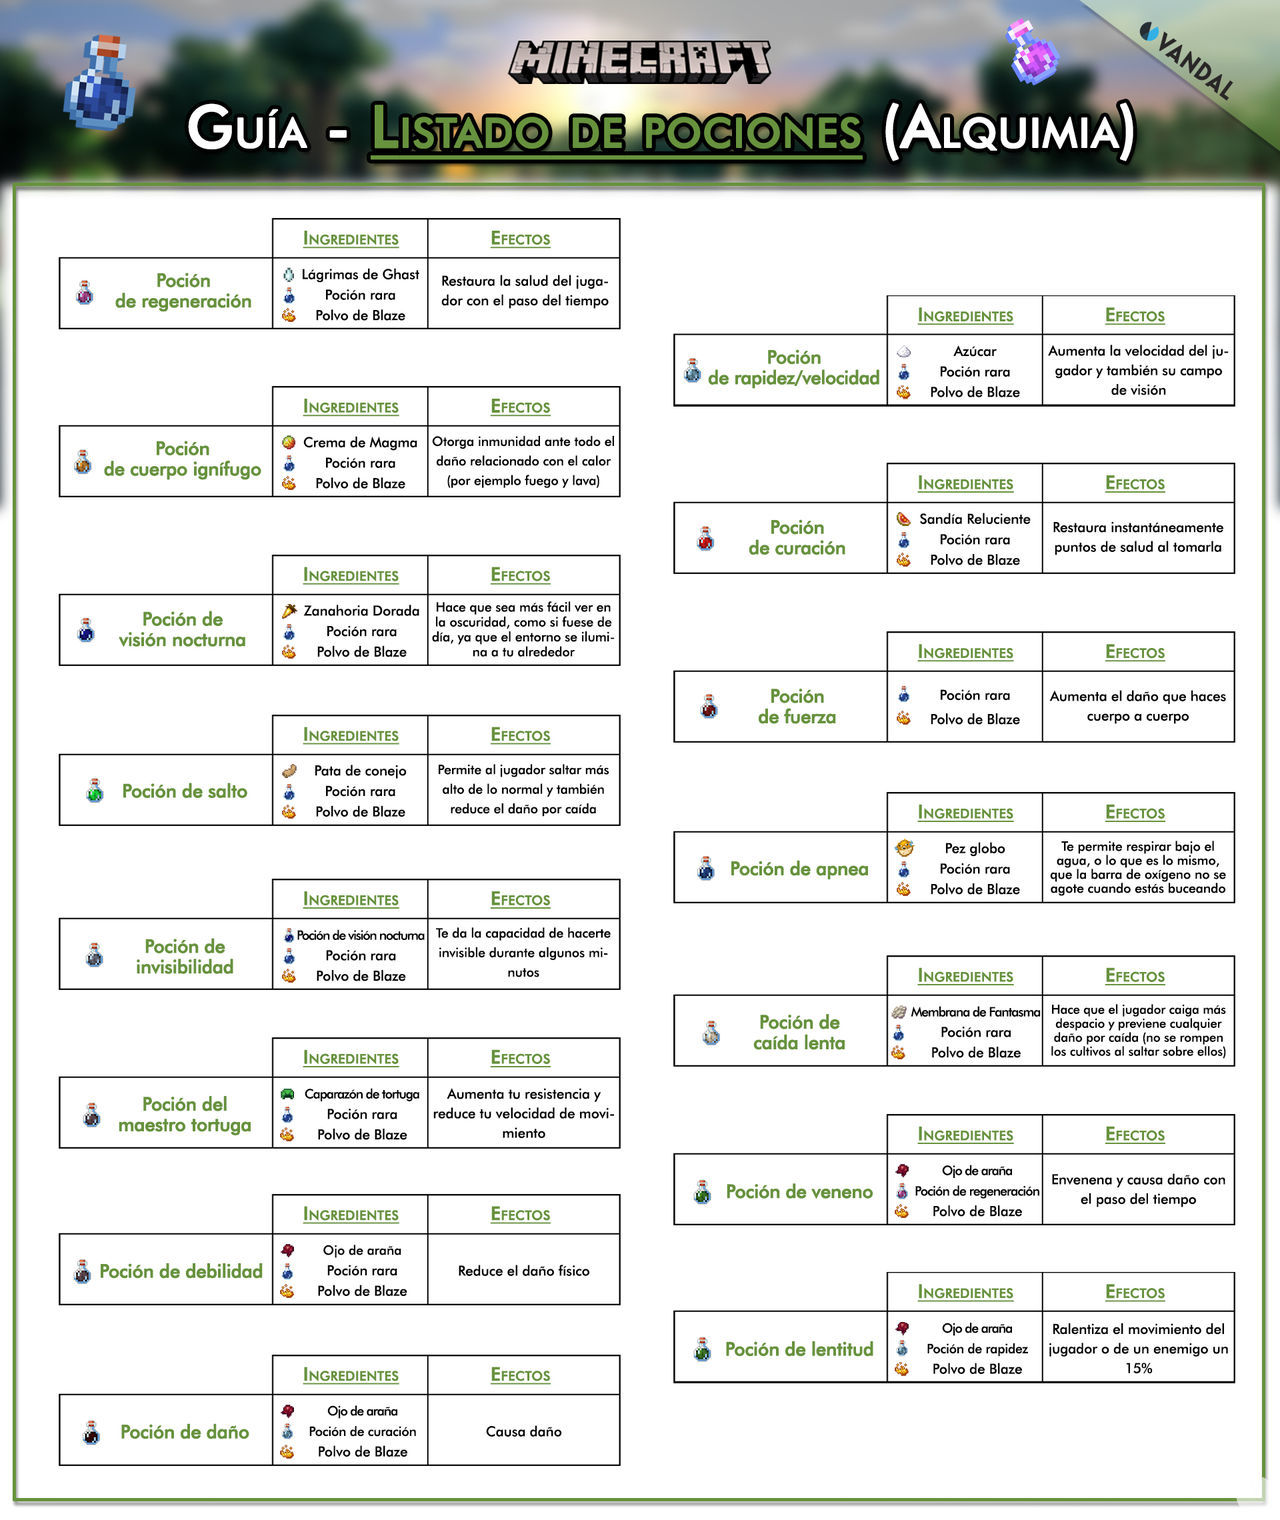
Here are all the potions you can brew in Minecraft:
| Potion | Required ingredients | Effects |
|---|---|---|
| Potion of Regeneration |
| Gradually restores the player's health over time |
| Potion of Swiftness |
| Increases the player's movement speed and field of view |
| Potion of Fire Resistance |
| Grants immunity to all heat-related damage, including fire and lava |
| Potion of Healing |
| Instantly restores health when consumed |
| Potion of Night Vision |
| Makes it much easier to see in the dark by lighting up your surroundings as though it were daytime |
| Potion of Strength |
| Increases the amount of melee damage you deal |
| Potion of Leaping |
| Allows the player to jump higher than usual and also reduces fall damage |
| Potion of Water Breathing |
| Allows you to breathe underwater, meaning your oxygen bar won't run out while diving |
| Potion of Invisibility |
| Makes you invisible for a few minutes |
| Potion of Slow Falling |
| Makes the player fall more slowly and prevents all fall damage (crops also won't break when you jump on them) |
| Potion of the Turtle Master |
| Increases your resistance but reduces your movement speed |
| Potion of Poison |
| Poisons the target and deals damage over time |
| Potion of Weakness |
| Reduces physical damage |
| Potion of Slowness |
| Reduces the movement speed of the player or an enemy by 15% |
| Potion of Harming |
| Deals damage |
Note: this list doesn't include the Potion of Luck (exclusive to the Computer and Legacy Console Editions) or the Potion of Decay (exclusive to Pocket Edition).
Remember that any potion can also be turned into a Splash Potion. Simply return to the Brewing Stand and add the potion you want to convert, together with Gunpowder and Blaze Powder. Bear in mind that the effects of Splash Potions don't last as long.
To brew or craft potions in Minecraft, you'll first need a Brewing Stand. To make one, place three pieces of Cobblestone along the bottom row and a Blaze Rod in the center slot, as shown in the following image:

Cobblestone is, of course, a resource you can find almost anywhere. Blaze Rods, on the other hand, are randomly dropped when you defeat a Blaze. These enemies can be found in the Nether.
Now that you've crafted a Brewing Stand, interact with it. This will bring up the brewing interface, where you'll need to place several different items to make potions:
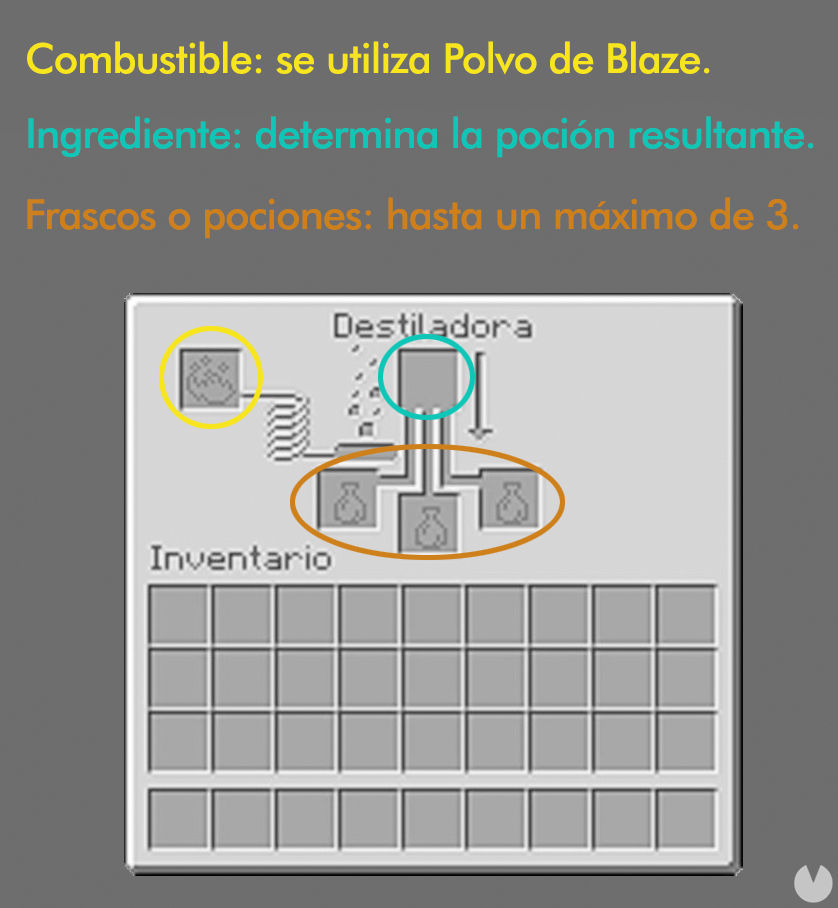
Here's what you need to know to understand how the potion-brewing interface works:
As a general rule, starting the brewing process with Nether Wart will produce Awkward Potions. If you want to create potions with special effects, you'll then need to repeat the process, this time placing Awkward Potions in the bottom slots where the Water Bottles would normally go and changing the ingredient in the top-center slot. You can check the different available recipes below.
The effects of brewed potions in Minecraft can be upgraded by following a few specific steps.
Bear in mind that only one of these two upgrades can be applied to a potion. In other words, you can either increase its duration or strengthen its effect, but you can't do both at the same time.
Finally, Splash Potions can also be upgraded into Lingering Potions. When thrown, these potions create an area-of-effect cloud that lasts for a while and applies the potion's effects to anything that passes through it.
To make Lingering Potions, you'll need to place the following items in a Brewing Stand:
The duration and potency of Lingering Potions cannot be upgraded.
